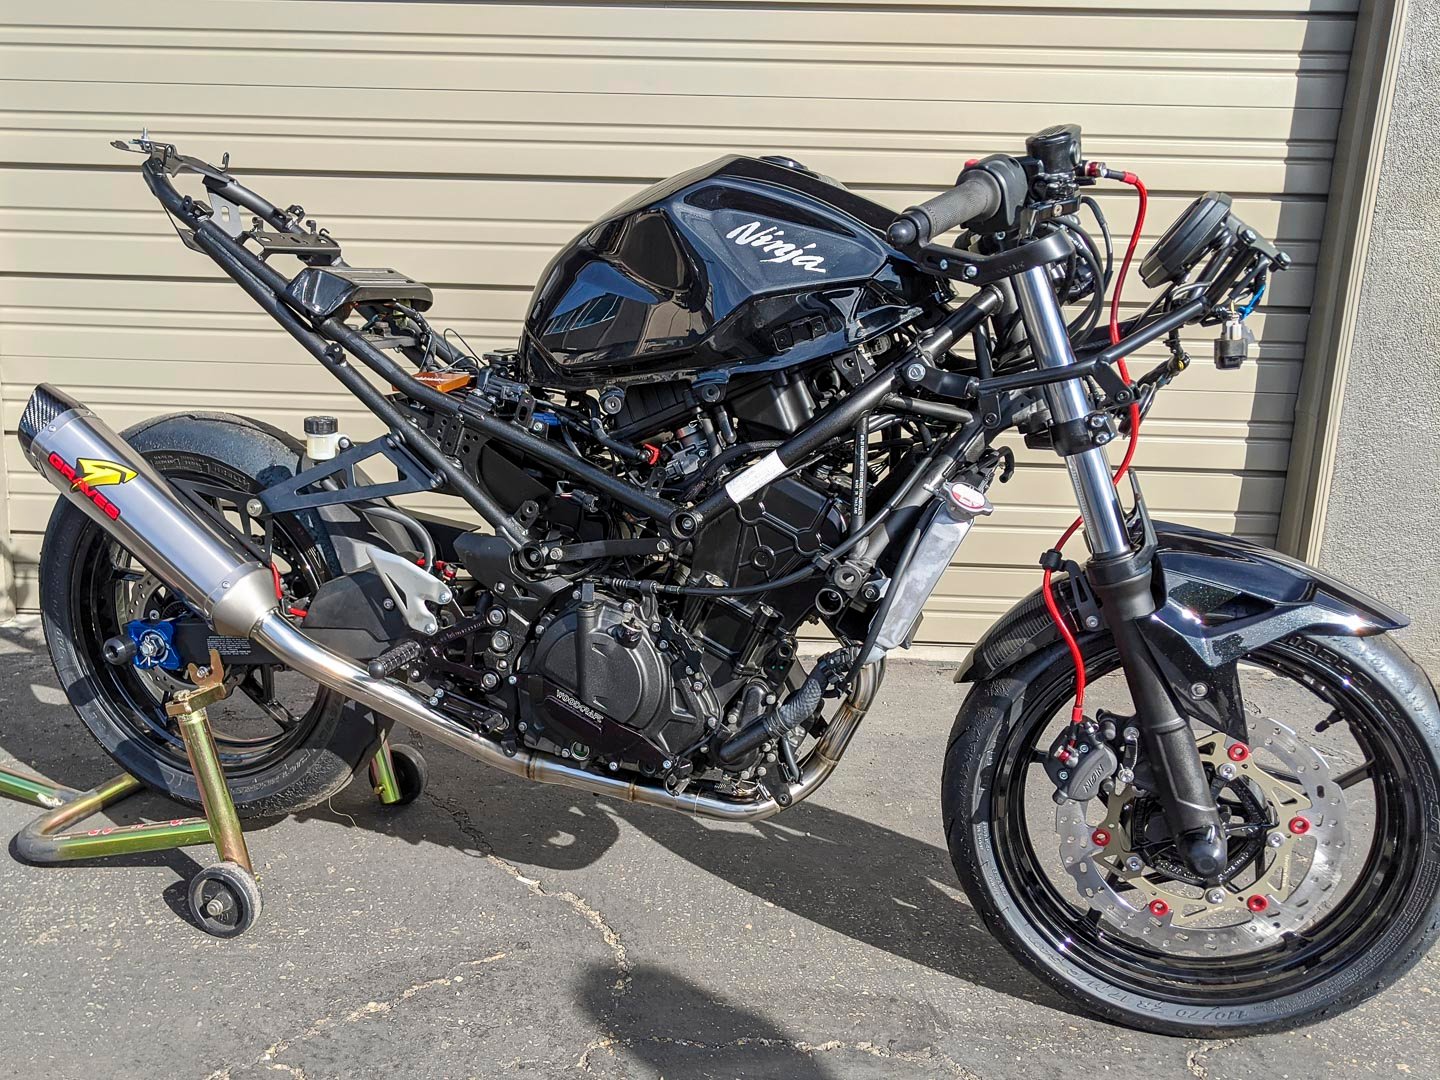
The lightweight motorcycle class has hit a fever pitch, and it seems that yours truly isn’t immune to the bug. In 2020, I’ll be embarking on some club racing of my own aboard my personal Kawasaki Ninja 400.
That means I’ll have the opportunity to toss some performance bits at the bike, including the Graves Motorsports Power Up Kit.
Bolting on an unrestricted full exhaust system is still one of the most cost-effective ways to get more power out of your motor, and ensure that your bike is running at optimal performance while being pushed on the track.
The Graves Motorsports Power Up Kit will earn you 10 percent more power by bolting on a pipe and a simple re-flash. Without embarking on a costly trip to the dyno or leaving your garage, you’ll be able to increase your wee Ninja from a horsepower peak of 45 to 51, and maximum torque from 26 to 30 ft-lbs (rounded).
Installing the exhaust is borderline self-explanatory, but to receive the performance benefits of a new exhaust system, you’ll need to adjust the fuel map. If you don’t, you’re leaving power on the table and operating the motor with improper air/fuel mixtures, which is harmful to your engine.
For some, the idea of modifying fuel maps using piggyback systems and ECU flashing can seem daunting to the average do-it-yourselfer. Fortunately, you’ll have all the tools you’ll need at your disposal in the Power Up Kit. I was able to flash my ECU, having never done it before.
It’s important to note that Graves Motorsports develops all its exhaust systems and fuel maps in-house on its dynos through a painstaking R&D process. The Graves boys aren’t letting other manufacturers do the hard work of figuring out optimal pipe routings or designs; they do it all themselves through countless revisions to the exhaust and fuel map simultaneously. That’s part of what you’re paying for when you choose a reputable brand.
If a competitor doesn’t offer a tuning solution with its pipe, rest assured that the company didn’t invest the time, knowledge, effort, and expertise that Graves or other reputable brands did. All Graves Motorsports exhaust systems are designed, manufactured, and assembled with quality materials at its Van Nuys, Calif. facility.
Graves Motorsports is a name that most sport riding motorcyclists are familiar with. Led by former racer and national titleholder Chuck Graves, the company has been in the business of making performance parts for both professionals and enthusiasts since 1990.
Chuck and his crew have been the tip of the spear for factory racing efforts in the United States, and were the driving forces behind numerous AMA and MotoAmerica road racing championship wins—a tradition continued today. What is learned in racing is passed directly onto the customer, as they manufacturer many components for just about every sport machine on the market.
Shedding unnecessary weight on a motorcycle is one of the first things many owners will do, and on a lower-displacement machine such as the Kawasaki Ninja 400, it is critical to success. My shiny new Graves exhaust, with a titanium silencer and hanger, weighs in at a svelte eight pounds. The original exhaust and hanger, along with all the emissions components, tips the scales at 15.8 pounds. In all, I’ll be saving 7.7 pounds, and I didn’t even have to cut out carbs.
Now for the strict disclaimer—these products are designed for closed-course and racing-use only. The rules in California are especially strict, so do due diligence before making a purchase regardless of where you live.
Let’s break down the benefits of the Power Up Kit before diving in:
10 percent horsepower and torque gain across the rev range
Improved fueling and throttle response
Improved air intake capabilities
Washable cotton fiber air filter
7-pound weight savings
Home ECU re-flashing
Slimmer profile and will fit race bodywork much better than OEM pipe
Looks much cooler, and jealousy will sweep through the paddock
That short yet potent list is more than enough to sell me on the package. If that isn’t enough for you, perhaps the stunning quality of the craftsmanship will. Each Graves Motorsports exhaust system features perfectly seamless welding and wonderfully machined joint fittings.
Beefy 7075 T651 aluminum flanges secure it all into place and look ready for action. Also, a lambda sensor bung is available should you want to run auto-tuning solutions, and a plug with tie-wire holes is included. In comparison to the stock kit, there is no comparison.
The muffler is expertly crafted and features an eye-catching carbon tip. Overall, the construction is superb, and it produces a sporty, yet tolerable level of volume that earplugs dampen quite well.
A good time to take on this project is when you’re initially prepping the bike for race-track duty, as you’ll be diving into several different areas of the machine and is easiest when it’s stripped bare. I was forced to run an aftermarket exhaust system, as the stock setup conflicted with my bodywork.
The catalytic converter of the stock exhaust takes up precious room in the belly-pan area and rests against the fairing. Depending on the bodywork you use, you may be forced to run a performance exhaust system that removes the catalytic converter. So, I did this install while waiting for race bodywork to come back from the paint shop.
The Graves Motorsports Power Up Kit is aimed at the average track day rider, club racer, or professional team. As someone that has never flashed his own motorcycle, I was able to complete the process without too much drama.
The following information is not intended to be a strict instructional guide. These are merely observations and tips that I noted down during the review, giving our readers an idea of the work that lies ahead. Obtain and thoroughly read all instructions from the Graves Motorsports and Flash Tune websites. If you do not feel comfortable doing this yourself, have a licensed professional install these components.
Graves Motorsports Full Exhaust
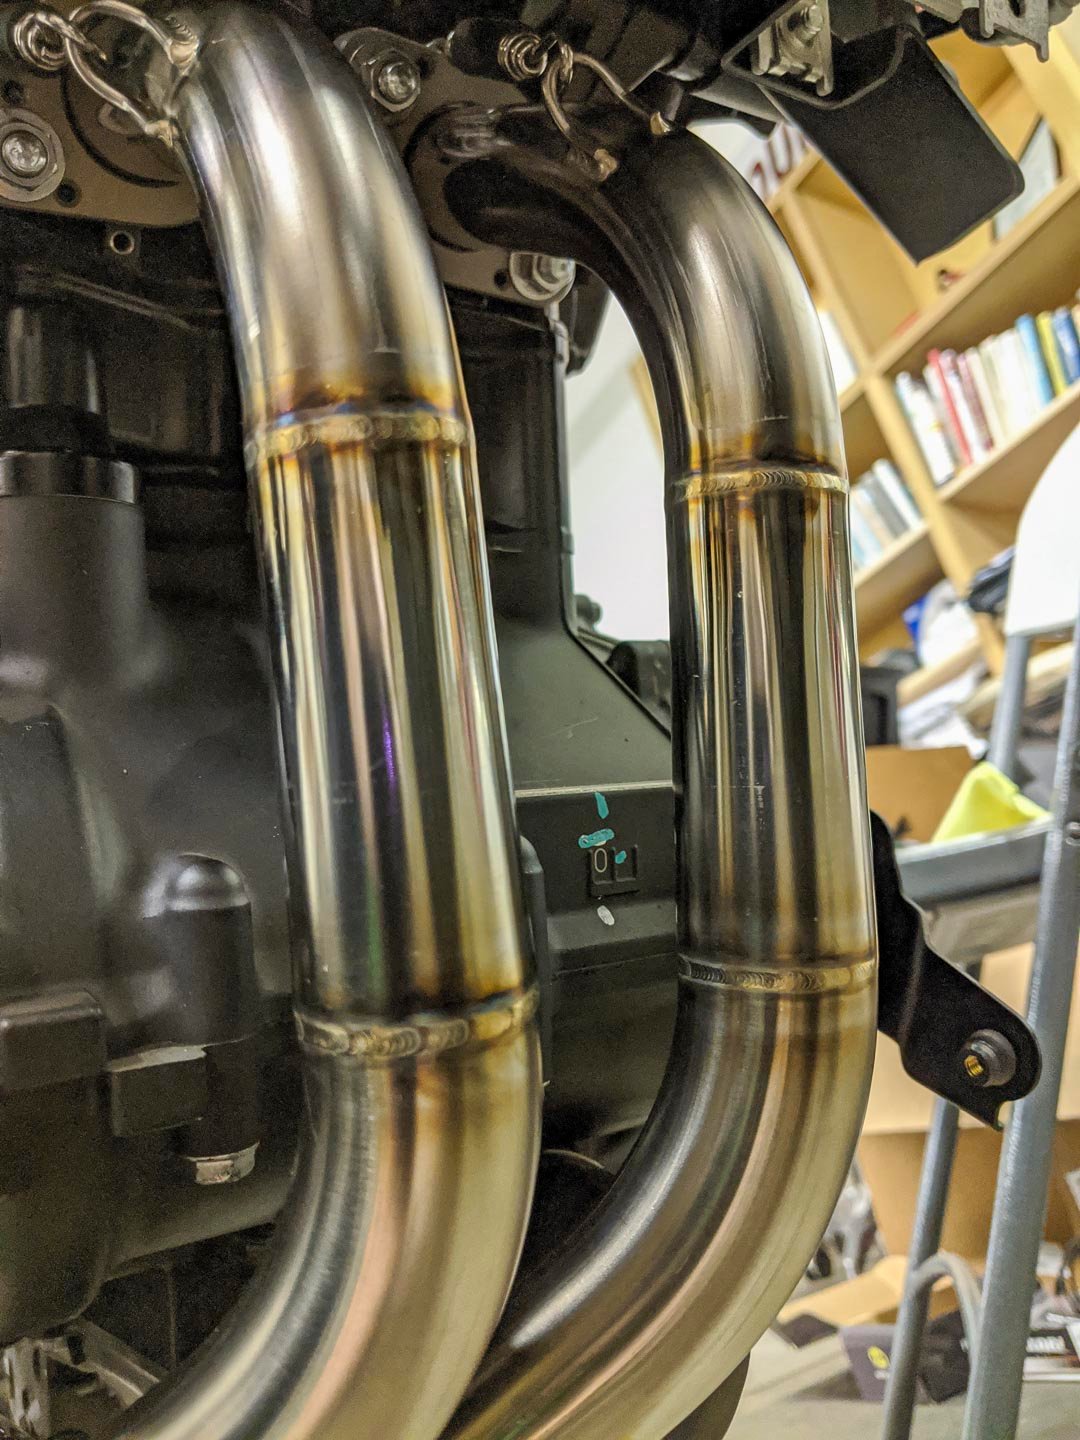
Installing the new pipe is one of the most manageable steps in the process. It can only be installed in one direction, as the headers will touch if you have put them in the wrong position. Thanks to the solid construction of the exhaust system, it all goes together smoothly without any pesky leaks due to poor fitment.
Here are the highlights of installing the system (full instructions are available on the Graves Motorsports website):
Install your new lightweight exhaust hanger. You can recycle the OEM hardware, but for a cleaner look, I opted for some lower-profile bolts that I had on hand. Affix the brake reservoir to the hanger.
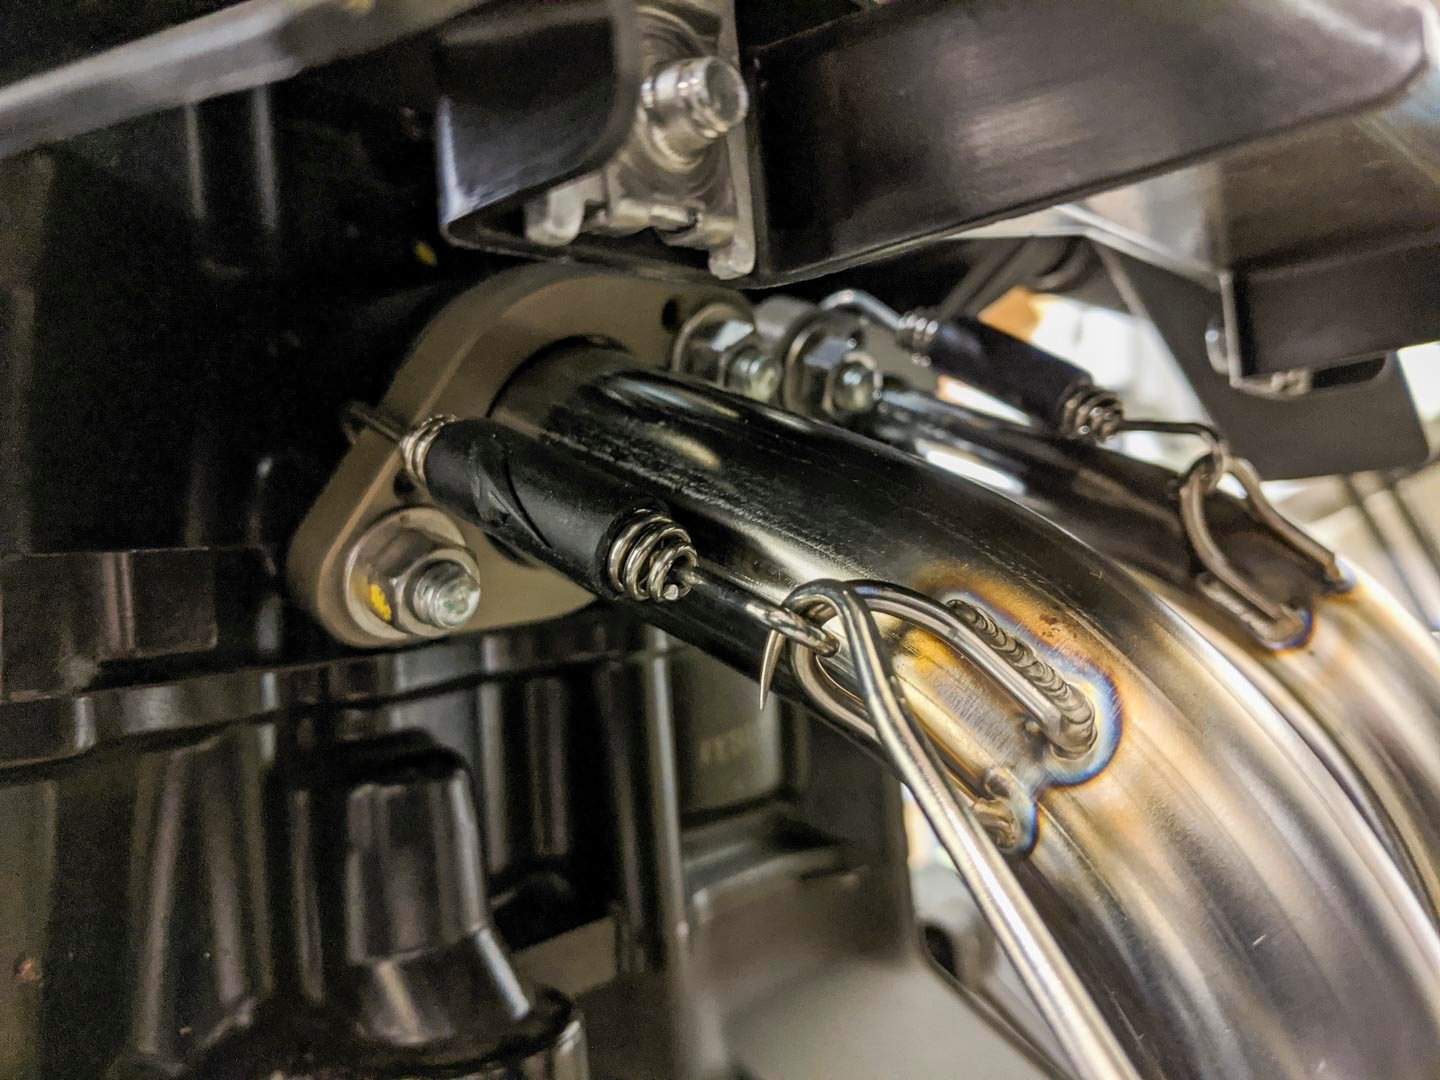
I strongly suggest that you segment the sections. Begin by installing the headers, making sure that the copper O-rings in the heads are correctly seated. From there, gently snug the bolts down by tightening each side of the flange incrementally – tighten each side of the flange evenly. Do not fully secure the bolts down yet; go roughly hand-tight.
Work your way back and slide the mid-pipe into place. For now, it will be hanging freely.
Slide the silencer into place and secure it on the hanger. Again, only do this hand-tight for now. Make sure the pipe is straight and aligned correctly.
Move back to the headers and carefully torque the header bolts to the manufacturer suggested 106 in-lbs of torque using a well-calibrated torque wrench.
Finally, cinch down the hanger bolts.
Go back through the system and install all of your springs. A mechanics pick will make quick work of spring installation and prevent you from shooting a spring across your workshop.
Wipe the entire system down thoroughly with isopropyl alcohol. Do not start the bike without cleaning the system first to prevent oils from burning onto the steel.
A mechanics pick is a great tool for installing exhaust springs.
Graves Motorsports Power Up Kit DNA Filter
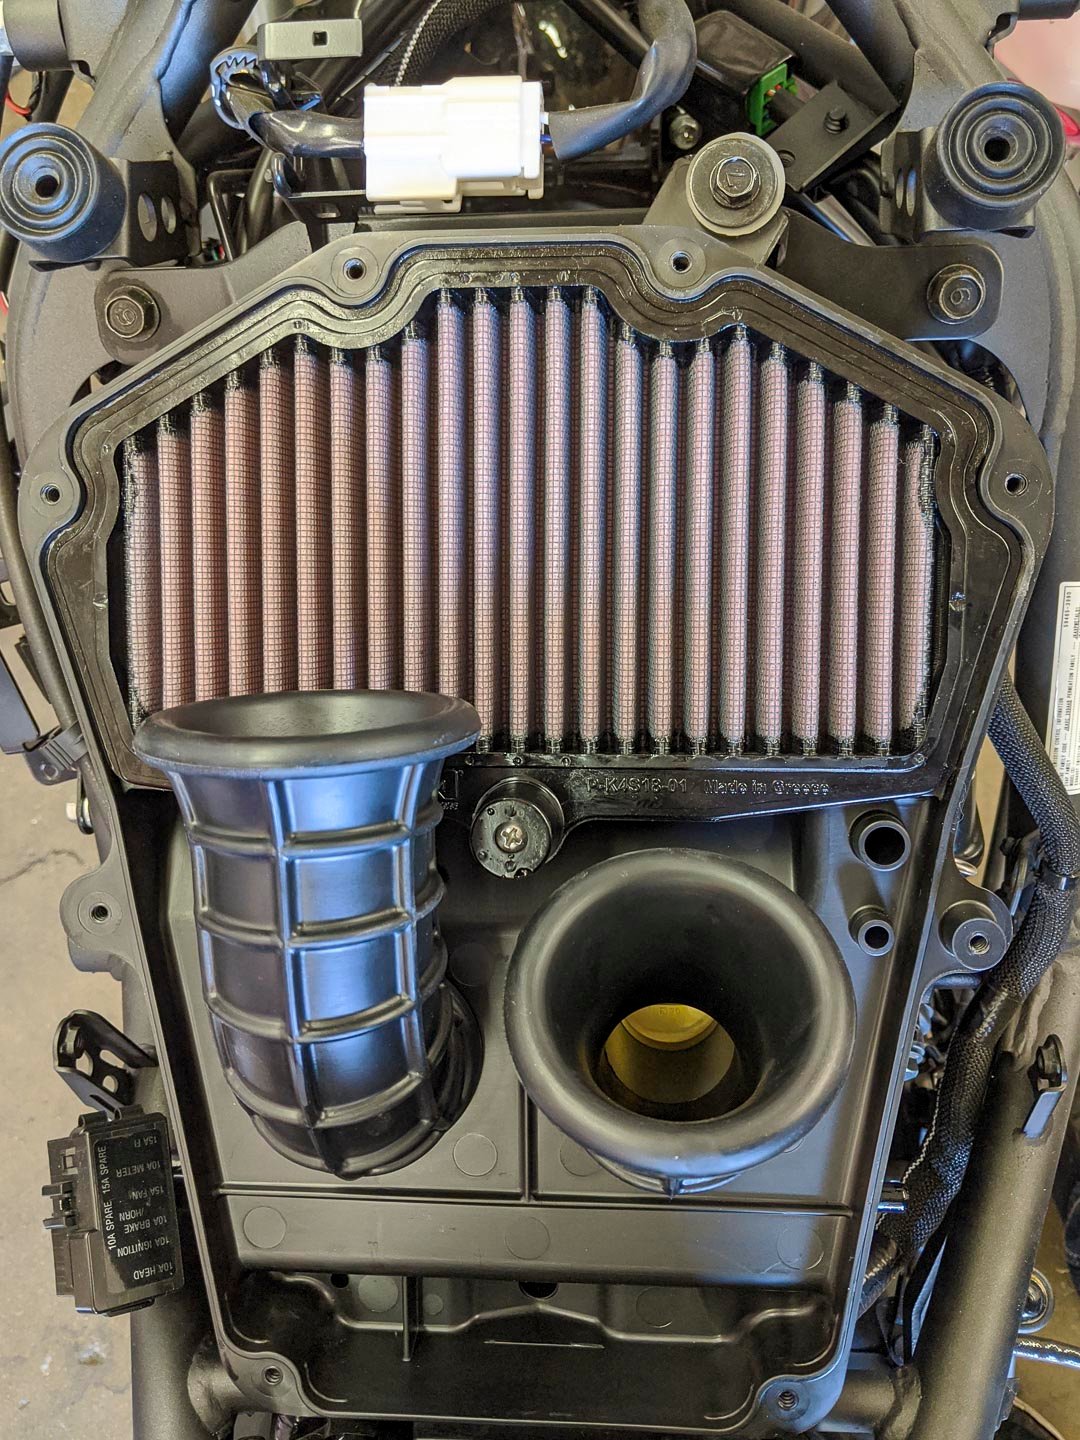
Accessing the air filter is something that any motorcycle owner will have to do during regular maintenance, and it requires fuel tank removal. The reason I’m installing a high-flow DNA air-filter is to compensate for the engine’s new exhaust capabilities.
DNA (Top) vs. OEM (Bottom)
If the engine expels gas more efficiently, thanks to our new Graves exhaust, it needs to intake air more efficiently, as well. The stock thin paper air-filter isn’t up to the task. Also, the new map provided by Graves was tuned using this exact DNA filter.
The pre-oiled DNA air filter claims to improve air-flow by 14.25 percent, going from 164.70 CFM to 188.20 CFM, when compared to the stock unit. Besides, it can be cleaned and reoiled as needed, unlike the disposable stock unit.
Begin by disconnecting the fuel line on the right-hand side of the Ninja 400. A red ‘quick-release’ clip can be lifted, and the fuel line can be disconnected. Be extremely careful when removing this, as you can break the fuel rail or damage the line. Gently remove it from the fuel rail. You’ll also need to disconnect the four-pin fuel pump connection towards the rear of the fuel tank.
Remove the bolts that hold down the tank and seat pan, if you haven’t done so already.
The fuel tank is held in place by two posts nestled in rubber grommets. Gently lift the tank upward at the rear and gingerly wiggle it towards the aft of the motorcycle until it has become dislodged from the grommets. Move the tank to a safe location. Take care to not crush the fuel line.
Remove the seven screws to the airbox cover to gain access to the airbox interior. Remove the single screw securing the filter in place, and replace it with the DNA filter.
Repeat the process in reverse for reinstallation.
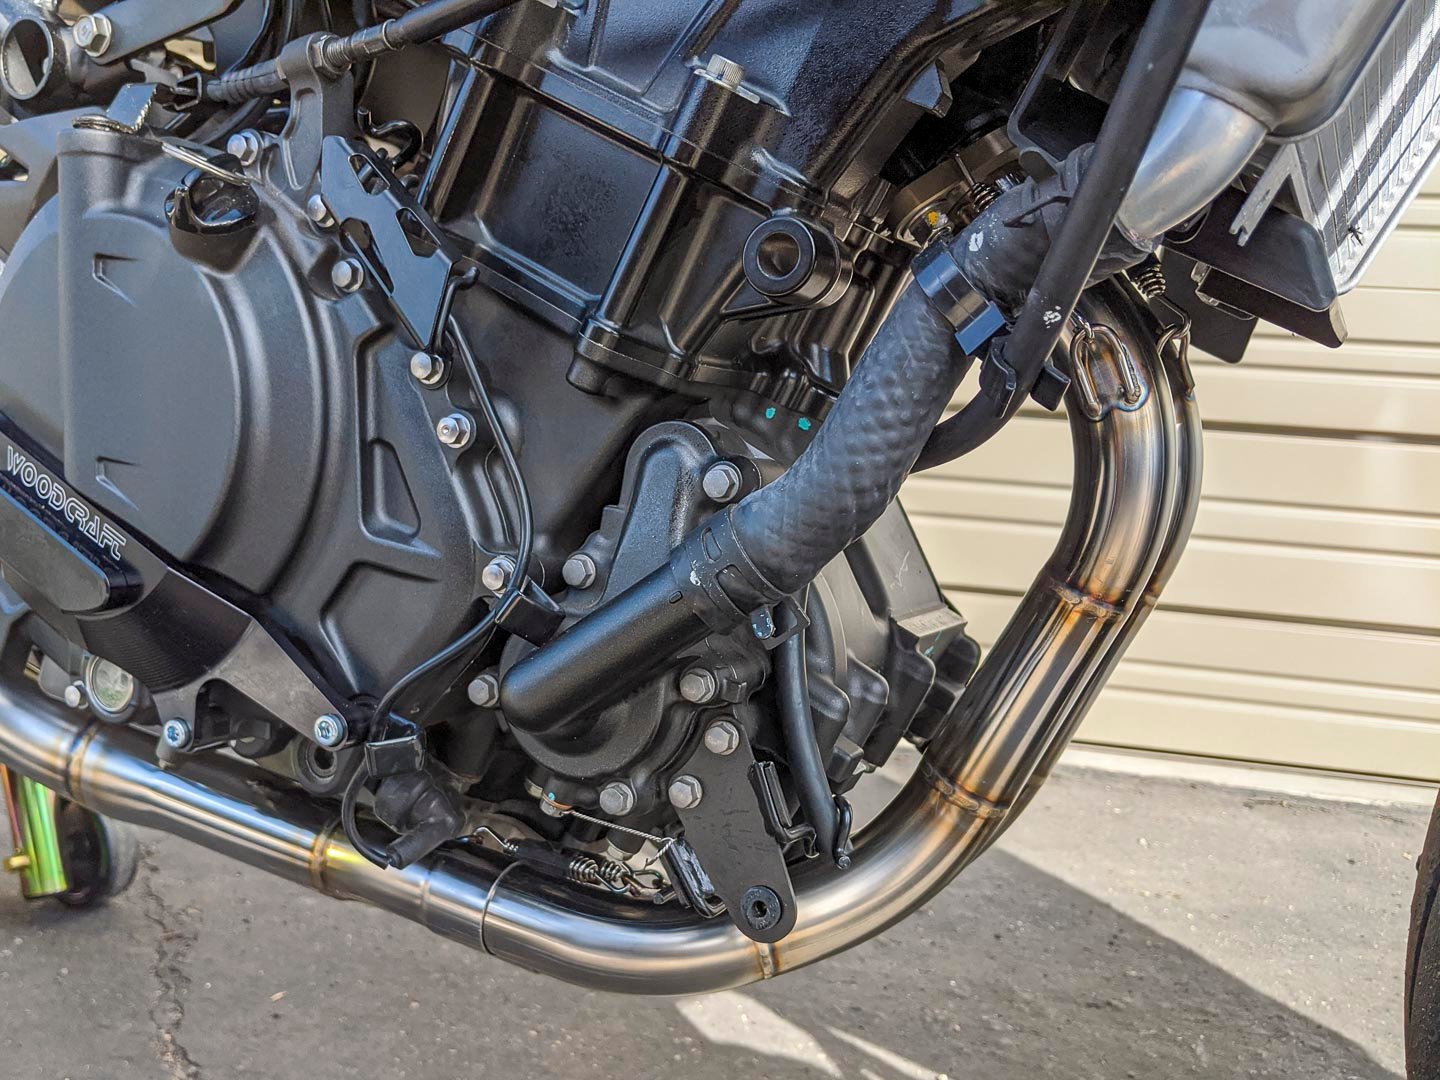
Smog Block-Off Plate
To make sure my Ninja 400 is running at peak performance, power-sapping emissions components need to be removed. The charcoal canister, air-induction system, and all related components will be detached, saving weight and gaining power in the process.
The expertly machined block-off plate does exactly as described—it blocks off smog hardware. Doing this ensures that the fueling is more consistent, as the fuel map was developed without these components in place.
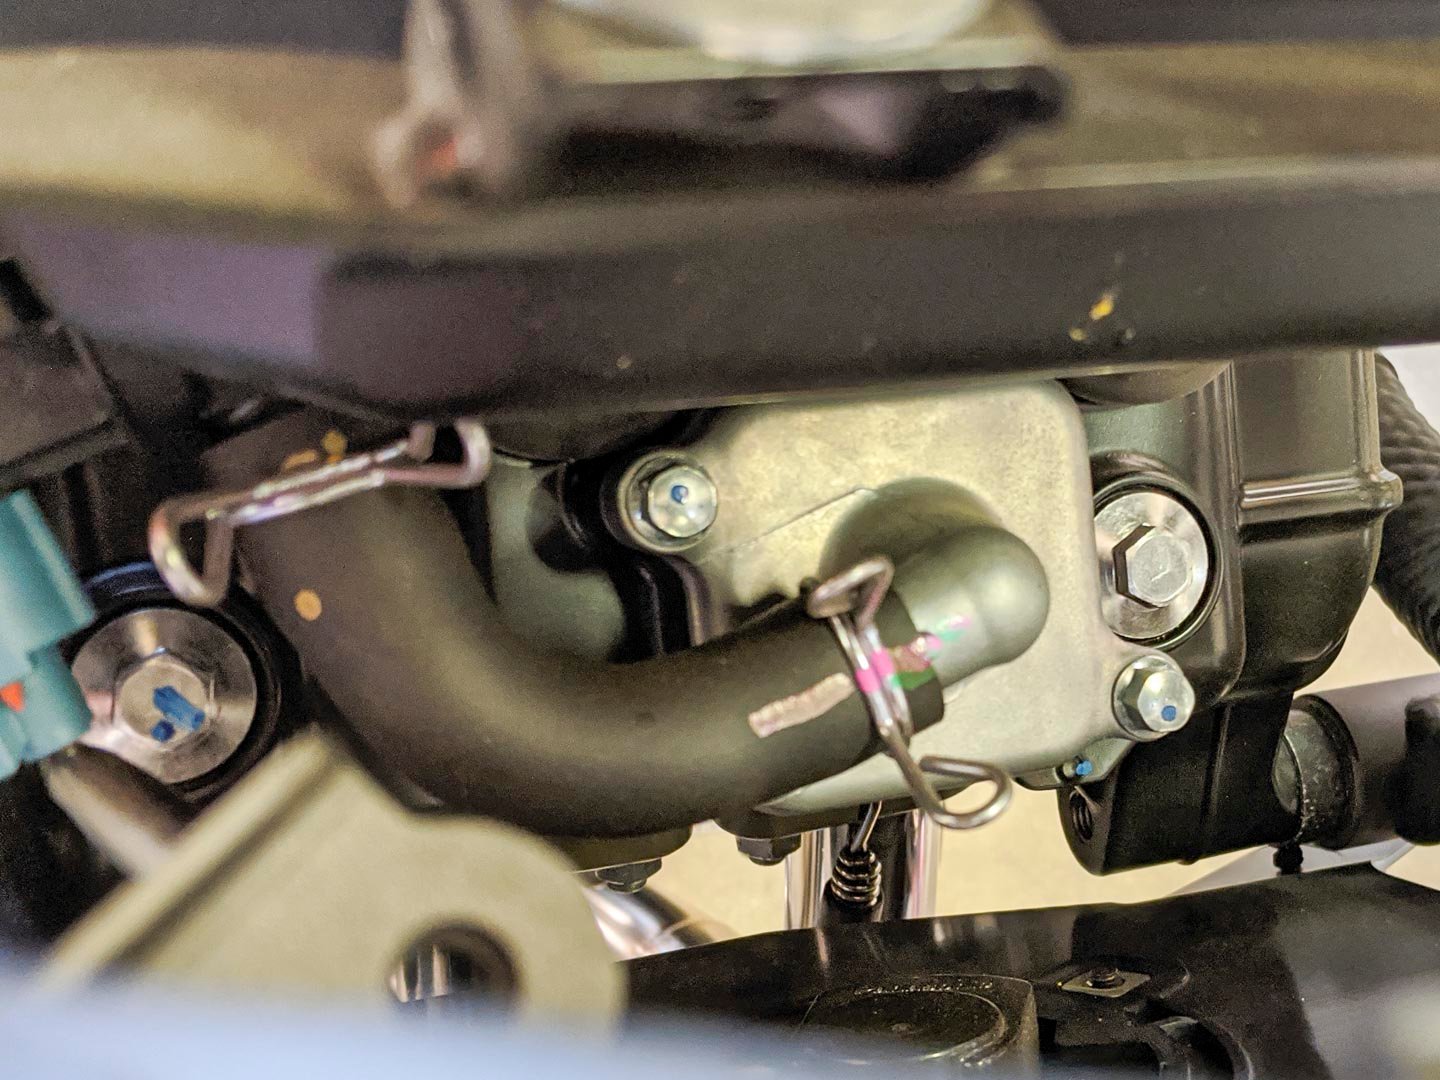
Begin by locating the rubber hose leading from the right-side of the airbox to the air-induction system situated on the top of the cylinder head. Disconnect that hose from the airbox, and cover the open duct with the rubber cap provided with the block-off plate.
Graves Motorsports provides the small rubber cap shown here.
Unscrew the air-induction-system cover. Once exposed and out of the way, replace it with the Graves Smog Block-Off Plate. Be sure that the plate is installed in the proper orientation. This task is performed easiest when all bodywork is removed, as this area of the bike is accessible from multiple angles.
Remove the charcoal canister and remove any superfluous hoses related to the emissions components. If you want to return the motorcycle to stock condition at some point, save all removed parts.
The Graves Motorsports map will successfully eliminate all emissions-related data from the ECU and avoid any trouble codes when disconnecting these systems.
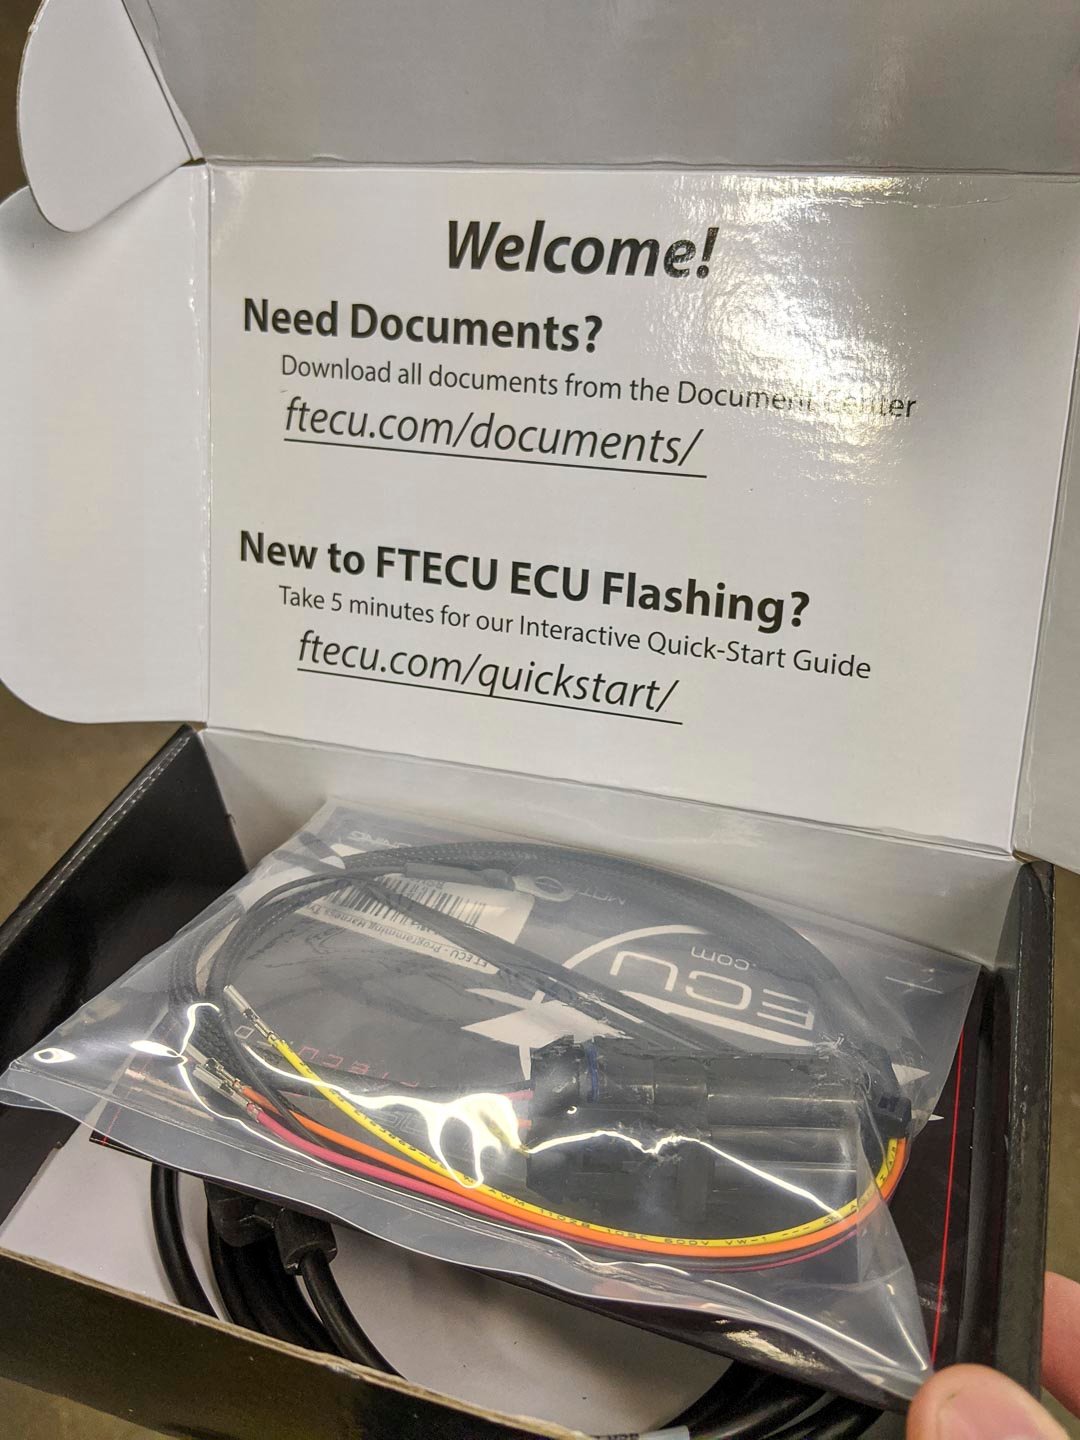
Flash Tune Bike-Side Harness
Opening the box, you will discover a Flash Tune DataLink USB Interface Cable and Bike-Side Harness.
Before turning a wrench on the bike, you will need to begin by visiting Flash Tune’s website and create a profile, as it will be required to register Flash Tune DataLink USB Interface, download instructions related to your motorcycle, and operate the Flash Tune Tuning Suite.
Note that Flash Tune software is only available for Windows XP SP3, and Vista 7, 8, and 10.
The simplistic Flash Tune Tuning Suite Interface is effective and easy to use. Flash Tune does provide access to a database of stock and unrestricted maps, should you need them for any reason. In our specific case, we will not.
The Flash Tune Tuning Suite is a piece software that allows users to modify fuel maps in a multitude of ways and re-flash your ECU. We should note that modifying your fuel maps is something that should only be done by trained professionals. Luckily, the Graves map is locked and ready to go, preventing users from improperly tuning their bike.
Upon purchase, the Flash Tune DataLink USB Interface Cable is issued one Flash Tune ECU license. This allows license holders to re-flash one machine exclusively. You may re-flash the ECU as many times as you want. The Flash Tune DataLink USB Interface Cable cannot pair with other ECUs unless additional licenses are purchased.
Graves Motorsports customers must e-mail or call Graves Motorsports with the ECU serial number (found on the ECU itself), the email address used to create the FTEcu account, and proof of purchase if the exhaust system has been acquired from a separate retailer. Graves will then provide you with a map for your motorcycle.
Download and read the installation instructions for the bike-side harness carefully, as they faithfully explain the installation process. Once again, I’ll hit the highlights and provide some tips.
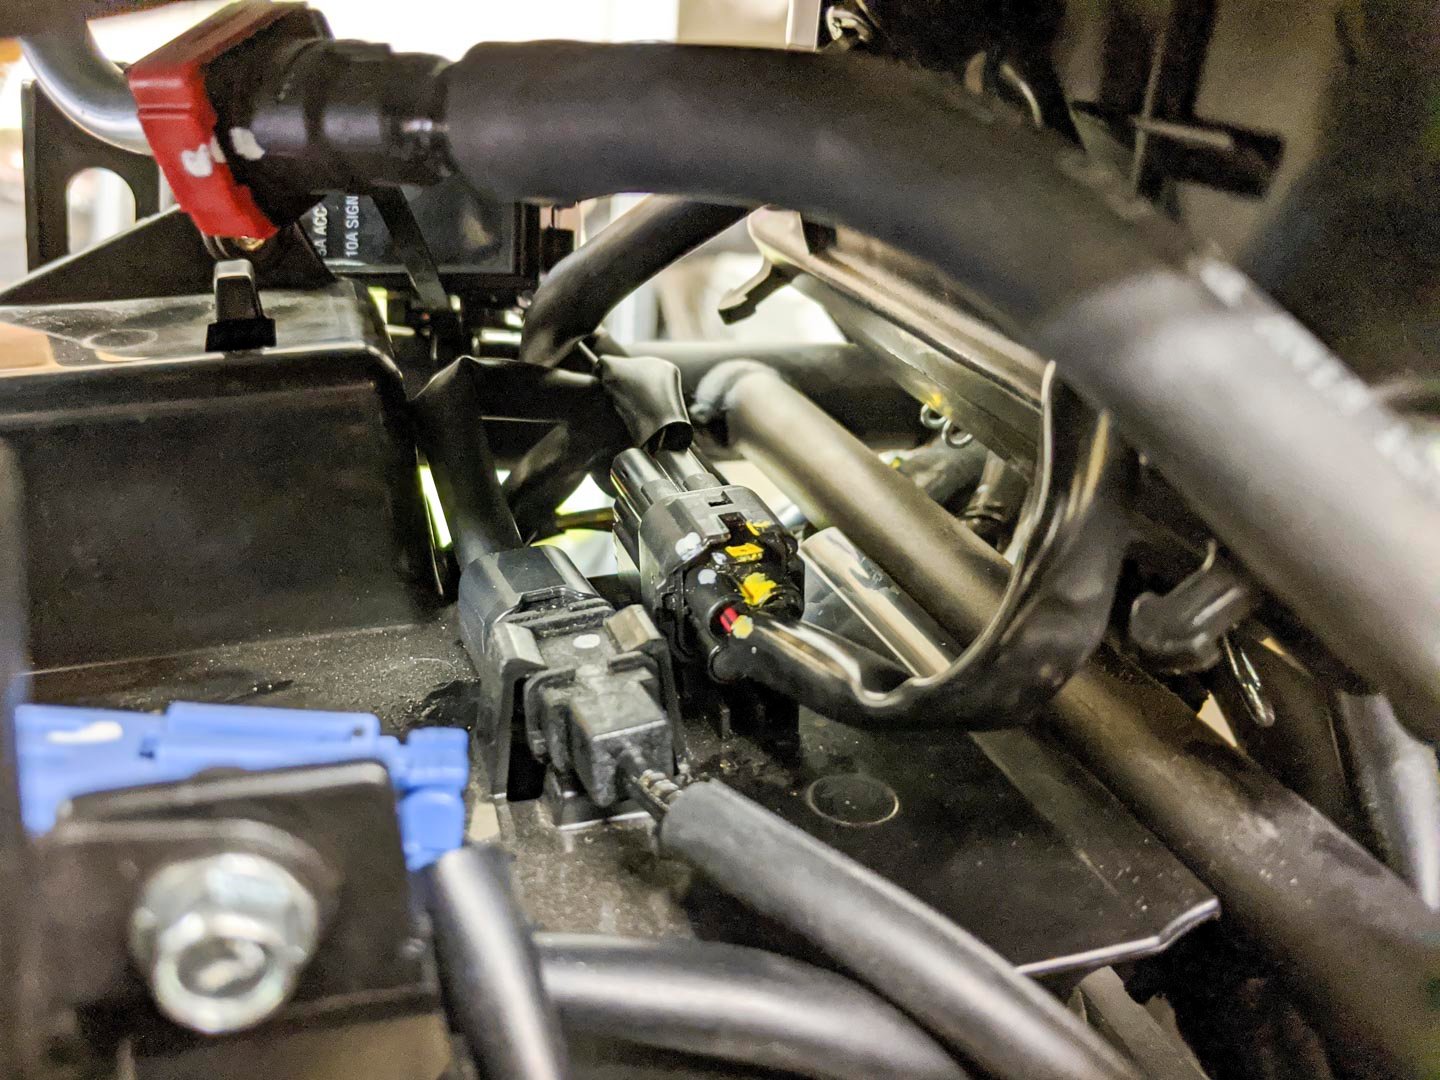
You will need to remove the ECU of your motorcycle, which is located under the seat. Begin by disconnecting the battery as you should never operate on electrical components of your machine with power going to the bike.
The ECU tray.
Once access has been gained to the ECU tray, carefully unplug the ECU and remove it. Place it off to the side safely.
Inspect the larger black 34-pin ECU connector. Remove the orange faceplate by using two small sharp objects against the releasing clips at each end of the faceplate.
Inspect the rear, wire-side of the ECU connector. Remove the white plastic weather sealing plugs at the back of the ECU connector using a small mechanics pick or other fine-pointed tools. Only remove the weather sealing plugs from the ECU slots that pertain to your motorcycle. Remove the plugs in position 6, 20, and 21, for the Ninja 400, specifically.
A ‘weather plug’ partially removed from the ECU connector.
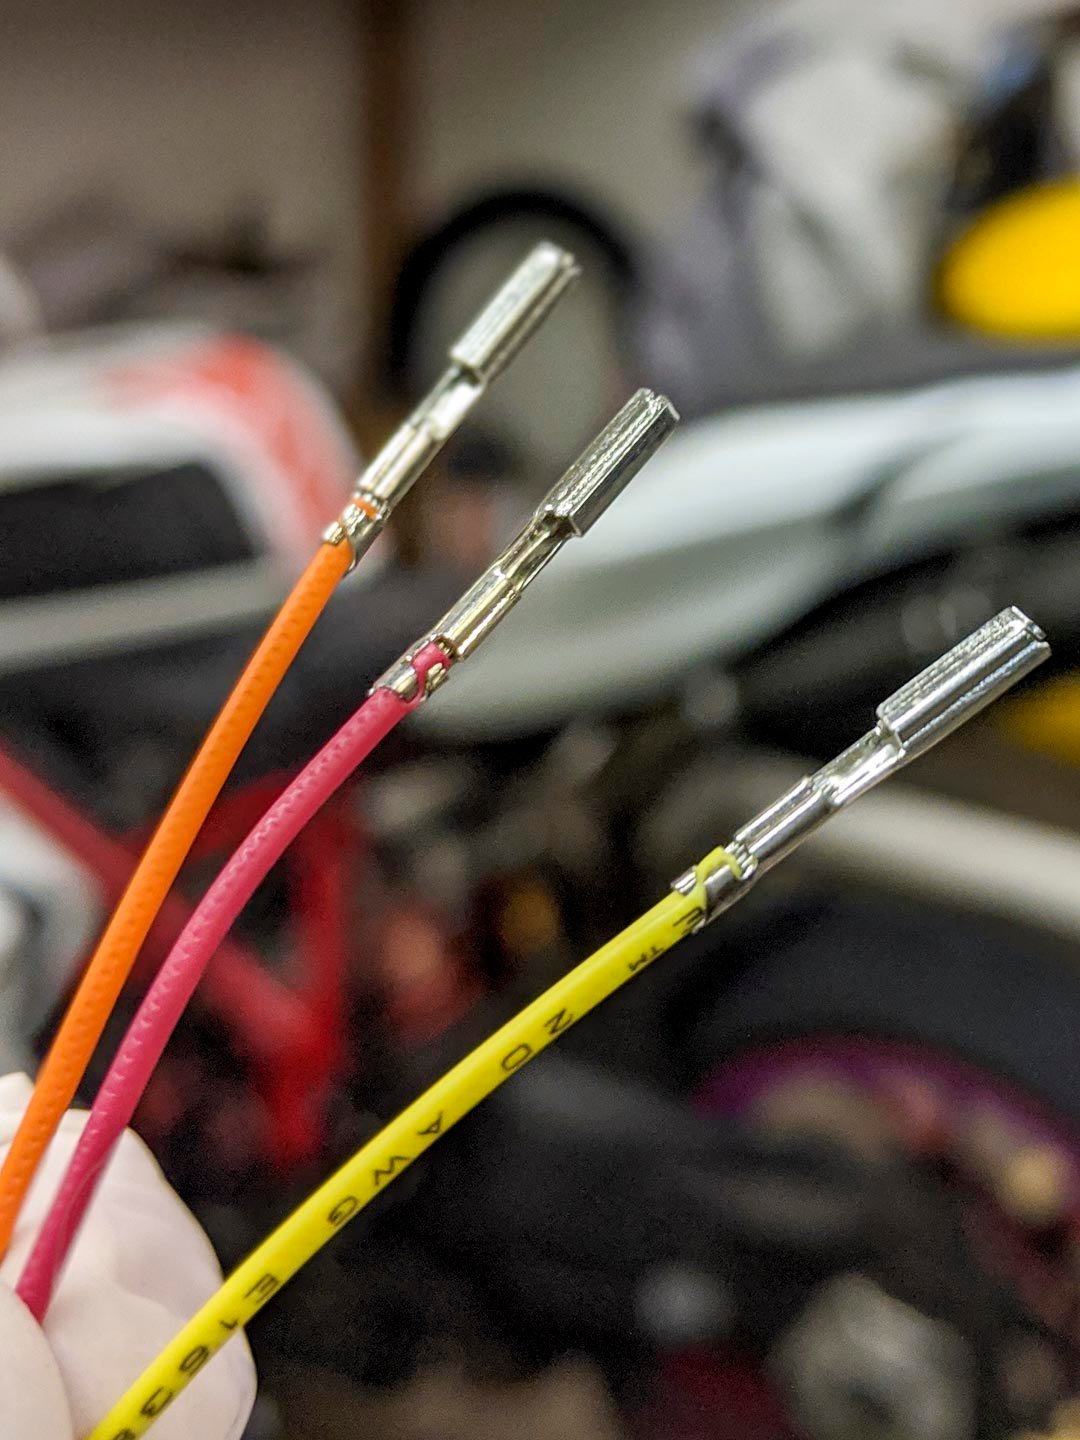
To install the bike-side harness, you will be inserting the bike-side programming pins into the wire-side of the black ECU coupler. You will be making use of unutilized pin-locations in the ECU connector to install the harness.
In the case of the Kawasaki Ninja 400, the yellow wire will be in position 6, red into position 20, and orange into position 21. Make a note of the embossed numbering at either side of the connector to help locate the proper pin position.
Be sure that the crimp-side of the programming pin is facing upwards in the same orientation as the locking tab of the ECU connector. Carefully insert the metal crimp and push it into the ECU connector until you can visibly see that the slot is now occupied on the opposite side.
Note the orientation of the partially inserted ‘programming pin.’ The ‘notch’ must be in the same orientation as the ECU connector clip, marked by yellow paint.
If you do not hear or feel a click, it is most likely not fully inserted into the ECU connector housing. The pin cannot be inserted horizontally—it can only be installed vertically. Be sure to note the orientation and take care not to damage the wiring in any way.
Once you have successfully installed the bike-side harness and you can visibly see that positions 6, 20, and 21 now have connecting pins in place, reinstall the orange cap on the ECU connector.
The ‘programming pins’ will take up vacant slots in the ECU connector, allowing the bike-side harness to communicate with the ECU. If you do not see the ‘programming pins’ filling the correct slot, you’ll need to check the orientation of the wire and make sure that it’s fully inserted. Note that there are several vacant positions – be sure you utilize the proper ones
Reinstall the ECU, reconnect your battery and button everything up.
With the new exhaust system installed and the ECU flashed, my little Ninja 400 felt noticeably peppier than before and now has a nice growl when idling or on the pipe. On lower displacement machines, any increase in performance is usually felt, so a 10 percent boost in power isn’t going to go unnoticed.
Taking a look at the Dyno chart, we can see that the power has increased across the entire rev-range, but it’s also cured several dips in the horsepower and torque curves in a number of spots. Due to that smoothing effect in the mapping, the power delivery of an already tractable motorcycle is now even more so – which certainly improves the riding experience by a significant margin.
Importantly, the fueling is far more responsive when opening and closing the throttle, in comparison to the relatively casual throttle response of the stock 400.
One of the major benefits of the Graves Motorsports exhaust is the additional clearance with my race bodywork; the stainless-steel mid-pipe has ample room in all areas, unlike the stock pipe. Previously, I had issues with the catalytic converter sitting resting against the interior of the bodywork, eventually scorching it—a major safety hazard.
No need to cut the plastics up – the Graves Motorsports exhaust has plenty of room to spare.
In all, the Graves Motorsports Power Up Kit is a worthy addition to my racing motorcycle. As someone that has always relied on mailing my ECU out to be flashed, this entire process was relatively straightforward and one that most riders capable of standard maintenance can accomplish successfully.
Having said that, if you have no experience doing this sort of installation and do not feel up to the task, we recommend that you seek the assistance of a licensed technician. Graves Motorsports and Flash Tune are US-based companies with excellent technical support, should any issues arise.
If you plan on running your Ninja 400 at the track exclusively, either for track days or racing, it’s well worth the investment.
For those looking to pick up a new system today, be sure to use the ‘ultimate’ discount code when checking out to receive a 20 percent discount on all Ninja 400 Power Up kits!
Graves Motorsports Power Up Kit Review (Kawasaki Ninja 400)
Have you ever wanted to ride a real MotoGP track? Well, here’s your chance! Leod Escapes does all sorts of incredible touring experiences with the very best that Europe has to offer. Fabulous accommodation, incredible food, and motorcycles what more can you ask for! So for the trip of a lifetime, visit LeodEscapes.com and check out your dream vacation.
* * * * *
The 2026 Aprilia Tuono V4 Factory 1100 remains one of the purest expressions of excess in motorcycling, standing proudly as an example of two-wheeled wish fulfillment done right. There are no gimmicks, pangs of guilt, or disappointment in the Tuono V4 Factory; it is simply a damn good bike. Nic de Sena tells us all about why you need this exceptional motorcycle in your garage.
* * * * *
This year, ARCH Motorcycle shocked the MotoAmerica Mission Super Hooligan series by capturing their first historic race win. To explore the massive behind-the-scenes effort that fueled this success, we sit down with Executive Producers John Stevens and Chance Wright, of the new six-part docuseries, Hooligans: The ARCH Racing Project with Keanu Reeves & Gard Hollinger. In this segment, they give us an inside look at the show, which follows ARCH as they transition from building custom bikes to entering the high-stakes world of professional racing. Joining us alongside is Brad Knight from technical partner BDO. BDO USA serves as the official race tech and consulting advisor for ARCH Racing. Their technology partnership centers around a bespoke, AI-powered race intelligence platform designed to drastically optimize the team’s track performance. The AI side of this project focuses on taking raw race and telemetry data and transforming it into immediate, actionable insights for the crew. It’s a fascinating insight into the new technology that helps make them faster on track.
* * * * *
Our guest this episode is Paul Puma, President of the United States Motorcycle Coaching Association (USMCA) and a Relationship Manager for Wells Fargo Motorsports Division. He leads the organization in connecting riders with certified coaches to promote nationwide safety, skill development, and sport growth.
* * * * *
Here’s quick reminder to check out our monthly digital magazine. It’s filled with everything you want to read on motorcycling, including some things you’ve probably not seen elsewhere. It’s absolutely free and you will find it on the Apple App Store and of course on Google Play as well.
Don’t forget to leave us your comments on our social media—we’re on all the usual platforms at Ultimate Motorcycling. We love hearing your feedback… so good or bad, please let us know what you think. If there’s something you’d like us to cover, we’d love to hear those ideas too!
We use cookies and browser activity on this website
Functional
Always active
The technical storage or access is strictly necessary for the legitimate purpose of enabling the use of a specific service explicitly requested by the subscriber or user, or for the sole purpose of carrying out the transmission of a communication over an electronic communications network.
Preferences
The technical storage or access is necessary for the legitimate purpose of storing preferences that are not requested by the subscriber or user.
Statistics
The technical storage or access that is used exclusively for statistical purposes.The technical storage or access that is used exclusively for anonymous statistical purposes. Without a subpoena, voluntary compliance on the part of your Internet Service Provider, or additional records from a third party, information stored or retrieved for this purpose alone cannot usually be used to identify you.
Marketing
The technical storage or access is required to create user profiles to send advertising, or to track the user on a website or across several websites for similar marketing purposes.
")