A Step-By-Step Guide To A Friendlier Honda CRF450RX
When Honda debuted the CRF450RX for model year 2017, we hailed it as a potent off-road racing weapon, with a motor, gearing, and power delivery quite similar to its motocross sibling.
The acceleration was ferocious, especially in the aggressive mapping mode, and the suspension settings and spring rates were a bit on the stiff side for off-road competition, thought ideal for a vet-style motocross track.
The 2018 Honda CRF450RX is essentially the same bike as the previous year, however Honda opted to reduce a little weight by dropping the kickstart lever and swapping the old lead-acid battery out for a lightweight lithium-ion unit. Additionally, the ECU mappings and suspension valving have been optimized to increase rider “usability”.
With the 2018 Honda CRF450RX providing such a capable platform, we were excited for the opportunity to conduct a long-term test. Given the luxury of time, our project objective is to formulate the setups, seek out the upgrades, and discover the hacks to really create the ultimate do-anything dirt bike.
Part 1: Create a Baseline
Engine hours: 0 – 4.2
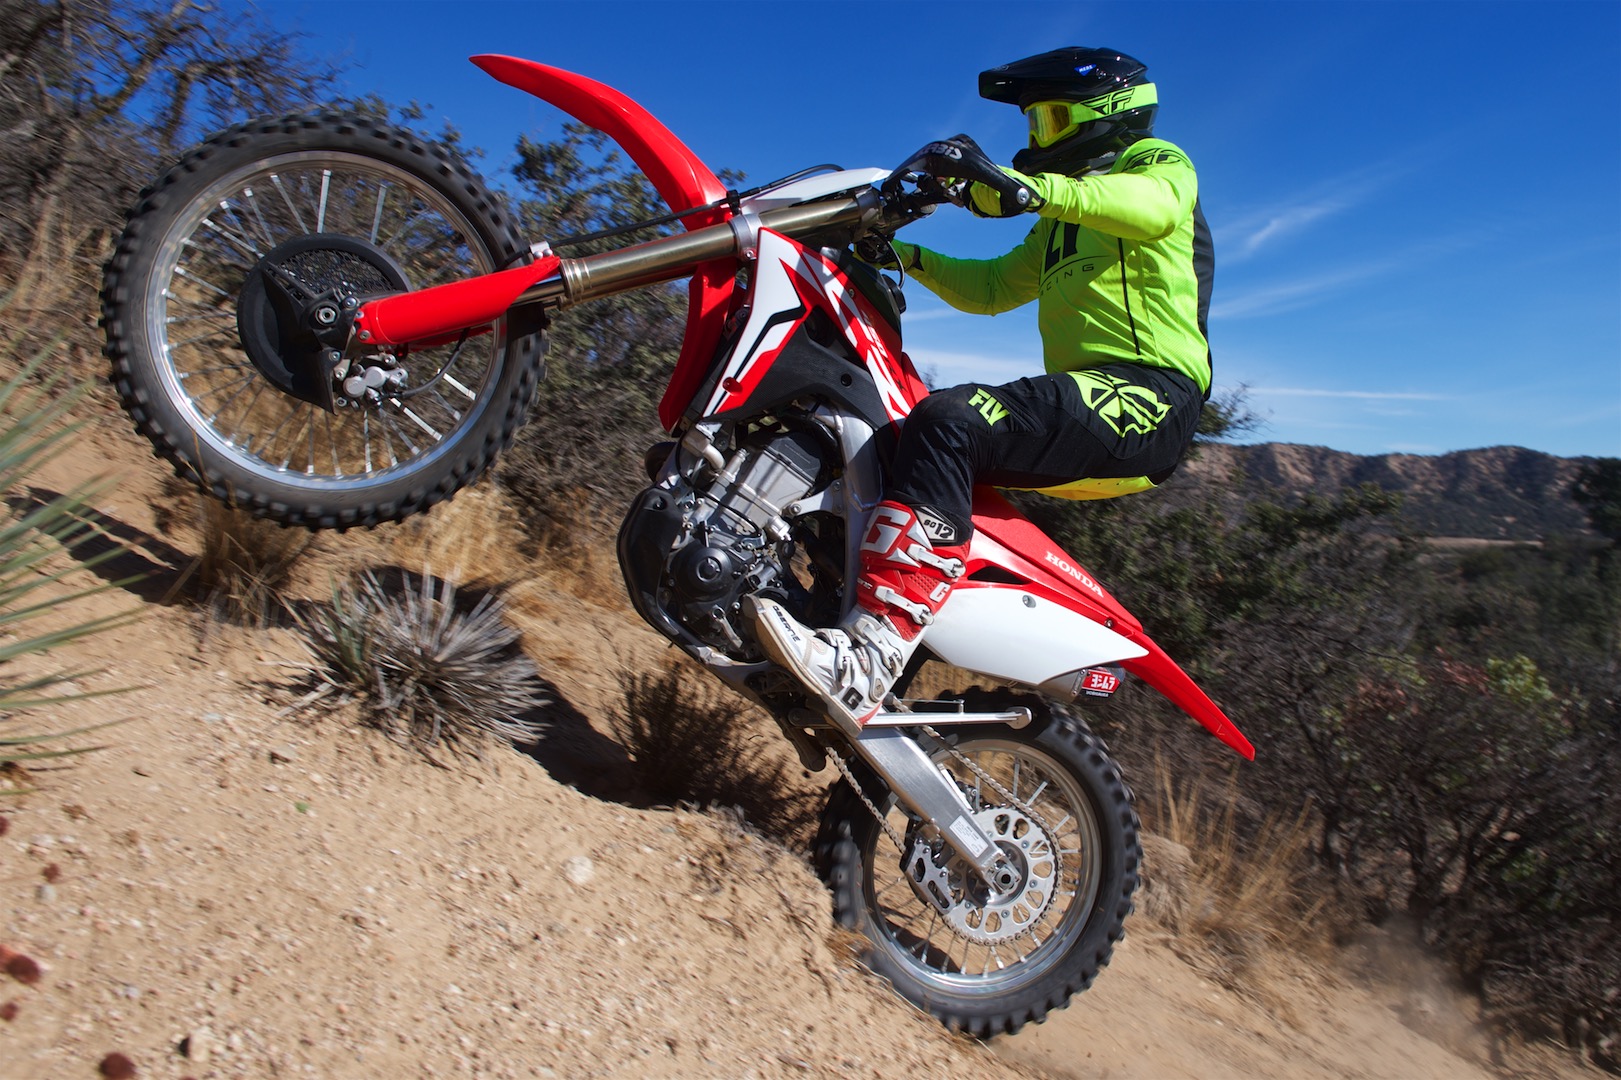
The Honda CRF450RX is a closed-course competition machine and, before we install the necessary exhaust items to put us on the right side of the law, we need to create a baseline for measurement and evaluation in completely stock trim. That’s when it helps to have friends with private property with all of the fixings, including an MX track, GNCC-style off-road loop, and a turn track that is great for fork settings.
Before I was halfway through the one-mile off-road loop, I could already appreciate the ECU and suspension valving changes that were made for 2018. Overall, the ferocious power delivery was smoother and less abrupt, allowing us to use both the Traction (1) and Standard (2) ECU mappings with great affect. To our delight, gone is the mid-range flat spot on the Traction (1) setting from the previous year.
On the suspension side, the fork seems to work better with a full tank of fuel than the 2017 version and the first-third of travel is more compliant over braking bumps. Contrary to the feel of last year’s bike, it’s not as necessary to slide your weight all the way to the gas cap to get the front end to bite.
Of course, the overall handling is Honda-sharp. We were quickly reminded of the stiff, yet precise feedback we got from the 2017 model, compliments of the aluminum frame and Renthal crossbar handlebar combination.
This is definitely an area of rider preference, and we like this feel for MX, but prefer a more flexible feel to reduce fatigue in longer format off-road race events. We’ll give this some time and additional evaluation before making any changes in this area.
Bottom Line: The 2018 CRF450RX rips! The small reduction in weight and tweaks to the ECU mappings and suspension valving work great are all welcome changes. Let’s go racing!
Part 2: Break-In Oil Change
Engine hours: 4.2
Unless you have your own personal mechanic—as my wife and kids do—you’re going to have a get a little dirty in the shop from now and then. After one ride, our CRF450RX needs a little TLC, so the Honda folks are sending us a care package to assist in this area. In the meantime, we’re going to go with the tried and true performance we’ve been getting from our test bikes by using Bel-Ray products.
The recommended service interval from Honda for changing the oil and oil filter is 15 hours. That’s twice as long as the Yamaha YZ450FX and 50 percent longer than the KTM 450 XC-F. To further put things in perspective, Honda also recommends that the piston and rings be changed out every 15 hours.
My approach is to change the oil and oil filter more often, so hopefully I can change out pistons and rings and less frequently. I’ve had good luck with this approach, but you ignore recommended service intervals at your own risk.
In the end, even the best oil is cheap insurance against engine failure. We use Bel-Ray Thumper Racing Full Synthetic Ester 10w-50 and have never had an engine wear issue. It will set you back about $16 a quart, and we think it’s worth every penny.
The entire oil change process on the CRF450RX is straightforward. Warm it up, remove the plastic skid-plate to access the oil drain plug, and let the old oil flow into a pan. Normally we hold the kill-button and turn over the engine a couple of times with the kickstarter to ensure we drain the entire cavity, but without a kickstart lever on the 2018 machine, a quick stab at the starter button accomplishes the same feat. With only one oil cavity to drain, and easy access to the filter, the entire process takes less than 10 minutes.
Examining the old oil through a translucent Ratio Rite measuring cup, it looks completely spent after a break-in period and 4.2 hours of flogging at the private test track. There’s no doubt that the monstrous horsepower from the CRF450RX puts a lot of strain on the clutch plates, as evidenced by the dark maple syrup look of the oil.
Bottom Line: Change the oil often! It’s fast, easy, and cheap engine failure insurance!
Part 3: Legalize It
Engine hours: 6.8
As much as I love riding at my buddy’s private place, it requires a lot of coordination and drive time, so we have to make our trusty CRF450RX legal for riding in the National Forests and the California State Vehicular Recreation Areas.
The dual exhaust setup of the Honda can represent a financial challenge when it comes to investing in spark arrestors. The truly budget-minded could switch to a single exhaust muffler system, but undoubtedly would experience a performance loss. Still, there are exhaust manufacturers that offer a single exhaust on the right and include an aftermarket side-plate for the left without the flare to hide the fact that a muffler is missing. Not ideal, and why invest in a new bike if you’re going to make it look old.
We contacted the performance gods at Yoshimura R&D and they set us up with their Signature RS-9T dual stainless-steel exhaust system with carbon fiber endcaps. These include USFS-approved screen inserts for legal compliance.
Although they are about the same weight as the stock aluminum mufflers, the Yosh RS-9T exhaust cans have increased volume and a larger core and claim to improve throttle response and provide mid and top-end gains. The Yosh team design and tested the RS-9T system in conjunction with HRC engineers, so the fit and finish is nothing less than Factory spec.
Once fired up, the exhaust notes at idle are crisp and throaty, and a twist of the throttle actually delivers a bark a bit quieter and less raspy than the stock exhaust setup, which is a very good thing on public or private lands.
The Yoshimura RS-9T setup looks incredible, installation is a breeze, and a quick late afternoon spin on the practice track showed that the performance is there. Now we’re legal!
Bottom Line: The Yosh RS-9T setup is the real deal. Don’t sacrifice performance or aesthetics to comply with Johnny Law.
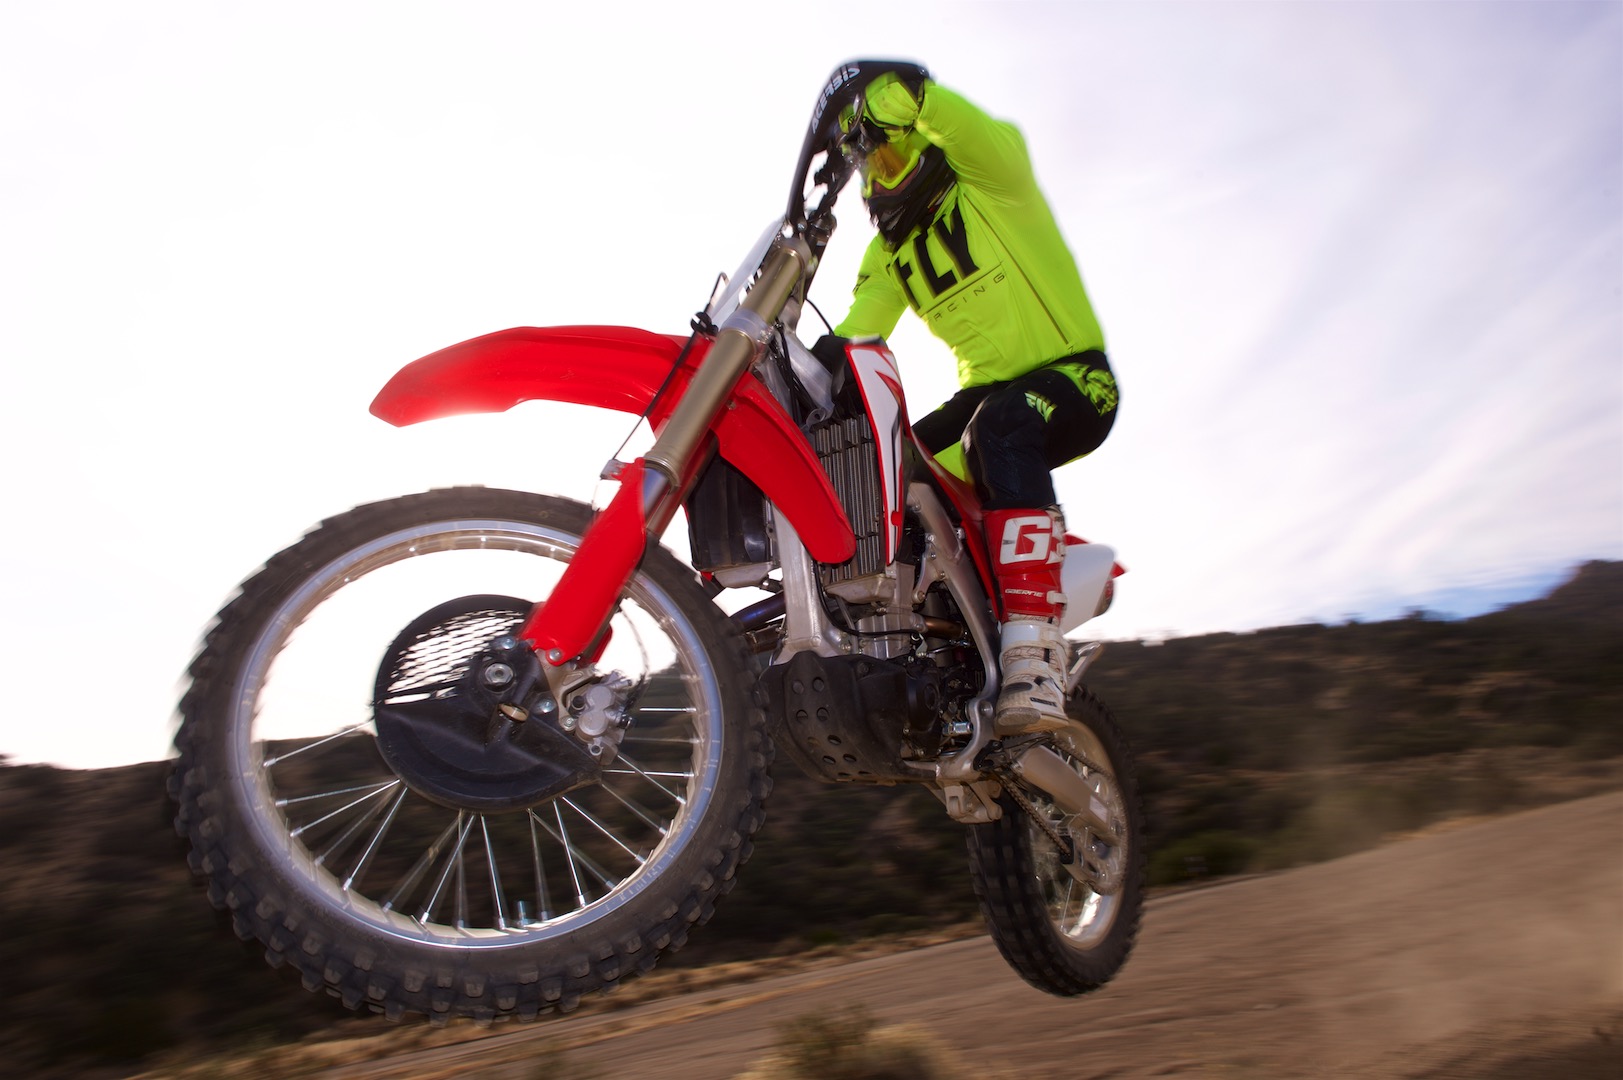
Part 4: To the Forest we Go!
Engine hours: 12.8
Now that we have our super-trick Yosh RS-9T exhausts installed along with the all-important spark arrestor inserts, we’re ready to rail the public trail system. Well, almost. Handguards are pretty essential, and we prefer the all-plastic wraparound type for two reasons.
An all-plastic design allows for the bars to flex, and with the stiff feel at the grips that the CRF450RX has, we need all the flex we can get. Also, the wraparound design helps to save levers in the event of a tipover, which can make all the difference in race conditions.
We bolted up a pair of Acerbis Rally Profile handguards. They are low profile for hot weather riding, so don’t expect much wind relief on those cold early morning shreds. Importantly, they are nearly unbreakable and fit the bill perfectly.
Given the close-ratio motocross transmission, fast and flowing trails are where the CRF450RX really excels. First gear is a little too tall for technical goat trails, and fifth gear isn’t tall enough for 80+ mph desert valley crossings. That said, with a 50-tooth rear sprocket, the RX is geared perfectly for everything in-between. Of course, if we had our druthers we would opt for wide ratio gearbox and/or a sixth cog, but we’re having too much fun to dwell on that for now.
Out on the trail, the Yosh exhaust has totally proven that its performance matches its stellar looks. Even with the spark arrestors installed, it feels like we’ve gained tractability without losing any top end power. Any remnants of a flat spot on the Traction (1) ECU map is completely gone. We couldn’t be happier.
As we’ve mentioned before, the stock suspension settings feel better than the 2017, especially the fork. For off-road racing, we like to optimize suspension setting to keep the bike balanced through whoops, and for all of your west coast racers, you know that’s about 90 percent of the terrain!
We tested out different settings with the rear shock, and settled pretty close to stock, with high speed compression damping at three full turns out, and low-speed compression and rebound at six- and 13-clicks out respectively.
The fork works well right out of the box. Depending on conditions and traction, we’ll go back and forth a couple of clicks on the compression and rebound as needed. Less damping in hard pack and slick conditions and a little more when traction is more abundant.
Lap times across our 12.5-mile off-road loop were quite impressive, and about 20 seconds faster over the 2017 CRF450RX in similar conditions. Also, worth noting is that in an effort to lessen fatigue on hands and forearms, we would typically ride this test course in the Traction (1) map on the 2017 model. However, thanks to the added tractability afforded by the Yosh system and the ECU mapping and suspension settings, the Standard (2) mapping is our preference on the 2018 Honda CRF450RX.
When the trail deteriorates to Endurocross-like conditions, the tall first gear coupled with a very light flywheel feel results in more than the usual amount of engine stalling. Revving up the motor to avoid flaming out the engine puts undue stress on the clutch, so we’re going to look at possible solutions for our next installment.
Bottom Line: The CRF450RX absolutely rails fast and flowing trails, with a motor, gearbox, and suspension optimized for race-pace trail riding.
Part 5: Oil, filter, and tires
Engine hours: 12.8
We’re a little over eight hours of motor time since our last oil change, so it’s time for another 1040cc of Bel-Ray Thumper Full-Synthetic Ester 10w-50 and a Honda OEM filter. Even with the abuse we’ve put on the clutch, the oil looks much better than the initial break-in oil change, which I attribute 100 percent to the Bel-Ray oil. I think we’ll stretch out the interval to 10 hours next go ’round.
It’s also time for some new rubber as well, though the stock Dunlop Geomax AT81 tires has proven to hold up extremely well. When the AT81s are new, the grip is fantastic, even on hard-pack blue-grooved clay. Even more impressively, once they wear after the first hard ride, they really kind of stabilize at about 85 percent of full grip and just stay there for an extended period of time—a great bang for the buck.
We spooned on another set of AT81s front and rear, but this time we’re going to try out the RC or reinforced carcass version in the rear.
Bottom Line: We like riding more than wrenching, so longevity is key. Two thumbs up for Dunlop Geomax AT81 and Bel-Ray Thumper Full-Synthetic Ester!
Part 6: Hinson Momentum Clutch Basket – the Rx for the RX
Engine hours: 15.3
We have just returned from another stellar day of riding and gear testing, and I’m continually impressed with the overall capabilities of the Honda CRF450RX. It’s a true big-bore machine in every sense of the term. With so much power and poise at your fingertips, it pays homage to its not-so-distant ancestor, the CR500R—albeit with much more refinement and grace.
Still, just like its big-bore brethren, the Honda CRF450RX can be a little unruly in tight situations. Today, we found ourselves doing a photo-loop in ultra-tight conditions, and we stalled the RX numerous times negotiating a turn-around spot in a tight slot canyon. Of course, keeping the revs up to avoid stalling would add heat to the clutch, while trying to “trials ride” the big red machine with the throttle just off of idle would inevitably lead to a stall.
If this were a game show question, we’d call for a lifeline. Yes, it’s time for an intervention.
Enter the collective expertise of the clutch experts at Hinson Racing, and they understood our challenge better than we did. It was no surprise when they claimed to have the perfect solution boxed and ready to ship—the Hinson Momentum clutch basket.
This is not your typical aftermarket aluminum clutch basket but a heavier version machined from aerospace grade billet steel. It effectively does two things: it adds “flywheel weight” or rotating mass to increase traction and prevent stalling at lower rpm’s, and it also provides a super-sturdy basket that can endure the abuse and power throughput inherent in the CRF450RX’s potent powerplant.
If you like wrenching on your bike, installing the Hinson Momentum clutch basket is a fun project that will require a couple of hours to do right. The Honda shop manual for the CRF450RX provided us with proper torque specifications. We also procured a new side-cover gasket, which we didn’t end up needing to replace.
Here’s how to do it:
Wash the bike, put it up on the lift, and warm up the engine for a few minutes. Drain the oil and replace the filter as you would for a routine oil change.
While waiting for the oil to completely drain, remove the rear brake pedal and let it dangle.
Drain the engine coolant into a suitable container, as this will go back into the bike when we’re finished.
At this point, some of you gearheads are probably wondering why we’re draining the oil and coolant and making such a big production out of clutch basket install. After all, can’t we just lay the bike on its left side and yank off the clutch cover?
Well, yes, we can on most 450cc bikes, and we could on pre-2004 Honda 450s, as well. However, the compactness of the modern engine design means that the aforementioned process of laying the bike on its side is fine for replacing clutch plates.
In the case of the Honda CRF450RX, when you need to replace the clutch basket, the entire side cover must be removed, along with draining the oil and engine coolant. There simply isn’t enough room through the clutch cover to remove the basket. Okay, back to work.
Remove the radiator hoses at the water pump.
Leave the clutch cover and water pump in place (bolted to the outside of the right-side case cover) and remove the entire side-case, keeping track of which bolts go where. I like to use a different color Sharpie pen for each length of bolt, using black on the standard-length bolts and green on the longer through-bolts. Mark a spot on the bolt head and a corresponding spot on the side cover to keep track.
Voila! We’re in. Now remove the pressure plate, clutch plates, and bend the tab back on the washer that secures the inner hub nut. Using a clutch basket tool to hold the inner hub, pop off the inner hub nut with an impact wrench or socket setup.
Remove the inner hub and basket, keeping all of the washers in the same order for easy assembly later.
We’ll need to use the stock Honda primary drive gear on the new Hinson basket, which means we’ll utilize a bench grinder to remove the rivet heads from the backing plate. For this task, the Hinson Racing instructions are excellent, and there are numerous YouTube videos to walk us through this process. At this point, we’re taking our time and being methodical—we’re almost there!
Once the primary gear is removed from the stock basket and installed on the Hinson Momentum basket with the supplied rubber cushions and Torx screws, we can toss the stock Honda basket and backing plate in the trash bin—or in a box, if you’re a hoarder.
Now we simply reverse the process for re-assembly, staying vigilant and not forgetting to refill the engine oil and coolant.
Okay, we’re ready to rock! Before we go, a quick project debrief is in order. It was obvious with the notching on the stock basket and inner hub that our stock clutch basket and clutch plates had taken a beating! It’s simple physics—the CRF450RX powerplant is a beast, and naturally it’s going to be hard on clutch and drive components.
The Bel-Ray Thumper Full-Synthetic Ester oil that we just drained looked great, so we suspect the bulk of the clutch wear occurred early, prior to the first engine oil change.
Armed with this bit of insight, we recommend changing out the stock oil with Bel-Ray immediately after the first break-in ride. We’ll be calling Hinson Racing to replace the stock clutch plates and inner hub with setup that matches the extreme durability of the Hinson Momentum clutch basket.
Bottom Line: The Rx for the RX: There aren’t a lot of motor mods that increase both performance and durability, but the Hinson Momentum clutch basket promises to be one of them—we’ll find out soon enough!
Part 7: Chassis Compliance 101 – The No-Cost Approach
Engine hours: 26.7
We have developed a great relationship with our Long Haul Project Bike—the 2018 Honda CRF450RX. Regular maintenance with Bel-Ray products has kept the Big Red off-roader trouble-free. After over 10 hours on the new Hinson Momentum Clutch basket, there is zero notching from the clutch drive plates, a testament to both Hinson durability as well as Bel-Ray quality.
The heavier steel construction of the Hinson Momentum Clutch basket has helped smooth out the RX’s power delivery and reduce the propensity for the engine to stall in tight trail situations.
An added bonus is that the smoother roll-on allows us to use the Aggressive (3) ECU map delivery when traction is abundant, without the typical abrupt and upsetting throttle response. All of the CRF450RX power is still there, it’s just packaged and delivered in a more usable fashion, with a little less ferocity. That is a good thing and helps us tame the beast.
The RX is essentially a potent CRF motocrosser masquerading as an off-road bike, including an aluminum chassis that is incredibly precise, while at the same time stiff and unforgiving. As we all know in off-road racing conditions, mother nature tends to throw a few surprises our way, and when things get out-of-shape on the CRF450RX, it’s not the easiest bike to reign back in. Mistakes can be costly.
So, we set out to engineer a little compliance into the chassis to make the bike a little more forgiving, especially in braking chop and flat hardpack corners—two areas where a little more chassis flex would settle the bike and increase traction, not to mention lessen rider fatigue.
At the CRF450RX media launch in 2017 we spoke with Baja legend Johnny Campbell and motocrosser-turned-rally racer Andrew Short about chassis tuning options, and how to a large degree it really comes down to personal preference.
For Baja racing, Campbell mentioned some of the chassis hacks that teams used to add flexibility or rigidity into the chassis in search of the perfect setup. In particular, they suggested experimenting with engine hanger stiffness, triple clamp metallurgy, and the torque of engine and chassis bolts.
Armed with a cordless drill and torque wrench, we set to work. We drilled out a single 12mm hole in each engine mount hanger to incorporate added flex. We started out smaller—7mm—and worked our way up to 12mm, which seemed to offer the most compliance without compromising overall structural integrity.
When reinstalling the drilled-out engine mounts, we used anti-seize grease on the threads to ensure an accurate torque measurement, and reduced the torque by roughly 15 percent, from 24 to 20 ft/lbs on the frame side of the mounts, and from 40 to 34 ft/lbs on the engine side of the mounts. Next, we lubed the swingarm threads with anti-seize and reinstalled the swingarm nut decreasing the torque from 65 to 56 ft/lbs.
Finally, we got a tip from my old friend and off-road racing legend Jimmy Lewis. He suggested we remove the lower exhaust mounting bolts that attach the exhaust pipes to either side of the subframe. This provided more flex from the subframe without (surprisingly) introducing any additional vibration from the exhaust system.
Out on our practice loop, these small changes made a noticeable difference in the overall chassis compliance. The RX is less skittish over hard, sunbaked braking bumps and rock- strewn trails. The propensity of the bike to deflect over sharp-edged obstacles and get out-of-shape is reduced, and the overall suspension action feels slightly softer, although we didn’t make any changes to the settings.
Bottom Line: Engineering a little flex into the chassis makes the beasty Honda CRF450RX a little more forgiving when the trail conditions get rough. The bike feels more planted overall and doesn’t want to upset as easily when getting on the gas and exiting turns. Even better, these modifications are totally free!
Part 8: Avik Moto Graphics– Beauty and the Beast
Engine hours: 31.2
We’ve made incredible progress in our quest to tame the mighty Honda CRF450RX, yet strangely something seemed to be aesthetically lacking. Despite all of our technical efforts to boost off-road performance, our project RX bike looked fairly ordinary. It was obvious that this beast needed some beauty.
We called on Avik Moto Graphics to give us a hand. Avik has supported our racing efforts both locally and abroad, from AMA District Desert races to the ISDE in Slovakia as well as the upcoming ISDE in Chile later this year. My wife and kids’ bikes are dialed in with all of their favorite logos and numbers from Avik Moto Graphics as well, so soliciting their help on the Project RX bike was a no-brainer.
We selected the Avik LZ1 Carbon Series complete graphics kit and had them add our AMA District 37series number and compliant racing stripe for competition. The custom graphics kit comes delivered in a box with the graphics carefully scrolled up to avoid any damage in the shipping process. The graphics utilize an 18 mil clear laminate that is digitally screen printed with solid colors for razor-sharp clarity and edges.
After unrolling the stickers and spreading them out on the shop floor, I grabbed a Sharpie and scissors to begin the process of cutting out each graphic, identifying where it goes on the plastic, and labeling it. It’s important to mock up each sticker against the bike, especially the airbox stickers, to ensure you have the correct graphic mapped to the proper location.
Prep includes spraying each piece of plastic with brake cleaner, followed by Windex, and wiping in-between with a clean microfiber cloth. Once the surface is clean and lint free, peel the sticker to be applied and spray the adhesive side generously with Windex. This allows for sliding the sticker around to get it into position.
Beginning from the center, and utilizing the squeegee that Avik provides with the kit, I gently worked out the air bubbles to the sides. A hairdryer speeds up the evaporation of the Windex. Also, the heat allows for stretching the sticker over curved surfaces such as the side plates.
You might think that the Windex would compromise the adhesion characteristics of the graphics. However, after 24 hours it’s fully evaporated, leaving the graphics virtually welded in place.
This process works perfectly every time, but it’s important not to skip a step. Preparation is key, as is the Windex and application of heat to get the perfect fit.
Bottom Line: The Ultimate Motorcycling Honda CRF450RX Project Bike is now a stunner. With logos from all of our partners, we’ve got the whole project represented, and this beast is turning heads on pit row!
Have you ever wanted to ride a real MotoGP track? Well, here’s your chance! Leod Escapes does all sorts of incredible touring experiences with the very best that Europe has to offer. Fabulous accommodation, incredible food, and motorcycles what more can you ask for! So for the trip of a lifetime, visit LeodEscapes.com and check out your dream vacation.
* * * * *
After a dozen years in limbo, the Super Glide is resurrected as a member of the Softail Cruiser family. The 2026 Harley-Davidson Super Glide arrives as a limited edition of 2500 units to celebrate the 250th anniversary of the United States of America. The new Super Glide proudly wears the iconic red, white, and blue of the 1971 original, and Don Williams tells us how this latest Softail feels on the road.
* * * * *
We’ve all heard the old saying, how you never see a motorcycle parked outside a psychiatrist’s office, right? Well, if you struggle with addiction and/or your mental health, then yes, you’ve probably figured out that motorcycles can be a big help. The Remix Racing Project is a California-based nonprofit and motorcycle racing team dedicated to raising awareness for mental health and addiction recovery. Founded by Jeremy Taubman and Shanea Makinson, Jeremy competes in the MotoAmerica Super Hooligan class and hosts fan-zone activities to provide resources and get conversations started. In this guest segment this episode Teejay and Jeremy chat candidly about going racing a little later in life, how it’s helping his own recovery, and what the Remix Recovery non-profit is achieving in helping others. Jeremy has published a book “Remix Recovery—Leading a Brave Space” and you can find it on Amazon. Needless to say, if you’re struggling with life’s challenges—and believe me—we understand, then visit The Remix Racing Project, click on the resources tab, and you’ll find help that’s just a phonecall or text away.
* * * * *
Here’s quick reminder to check out our monthly digital magazine. It’s filled with everything you want to read on motorcycling, including some things you’ve probably not seen elsewhere. It’s absolutely free and you will find it on the Apple App Store and of course on Google Play as well.
Don’t forget to leave us your comments on our social media—we’re on all the usual platforms at Ultimate Motorcycling. We love hearing your feedback… so good or bad, please let us know what you think. If there’s something you’d like us to cover, we’d love to hear those ideas too!
We use cookies and browser activity on this website
Functional
Always active
The technical storage or access is strictly necessary for the legitimate purpose of enabling the use of a specific service explicitly requested by the subscriber or user, or for the sole purpose of carrying out the transmission of a communication over an electronic communications network.
Preferences
The technical storage or access is necessary for the legitimate purpose of storing preferences that are not requested by the subscriber or user.
Statistics
The technical storage or access that is used exclusively for statistical purposes.The technical storage or access that is used exclusively for anonymous statistical purposes. Without a subpoena, voluntary compliance on the part of your Internet Service Provider, or additional records from a third party, information stored or retrieved for this purpose alone cannot usually be used to identify you.
Marketing
The technical storage or access is required to create user profiles to send advertising, or to track the user on a website or across several websites for similar marketing purposes.
")


 It’s also time for some new rubber as well, though the stock Dunlop Geomax AT81 tires has proven to hold up extremely well. When the AT81s are new, the grip is fantastic, even on hard-pack blue-grooved clay. Even more impressively, once they wear after the first hard ride, they really kind of stabilize at about 85 percent of full grip and just stay there for an extended period of time—a great bang for the buck.
 If this were a game show question, we’d call for a lifeline. Yes, it’s time for an intervention.


