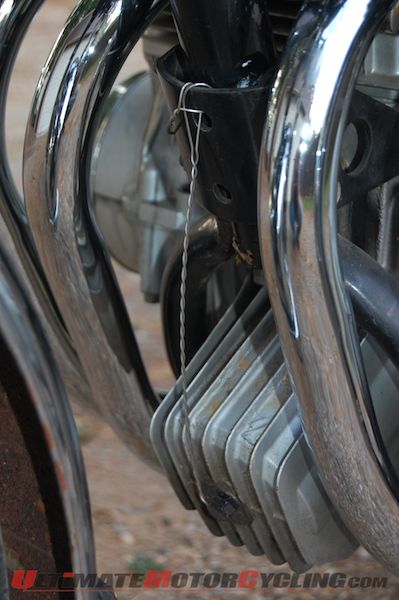
Here, the axle bolt and axle pinch bolt are safety wired together in another variation on the theme.
Here, the axle bolt and axle pinch bolt are safety wired together in another variation on the theme.
Sometimes finding a suitable anchor point requires a little creativity and lots of wire.
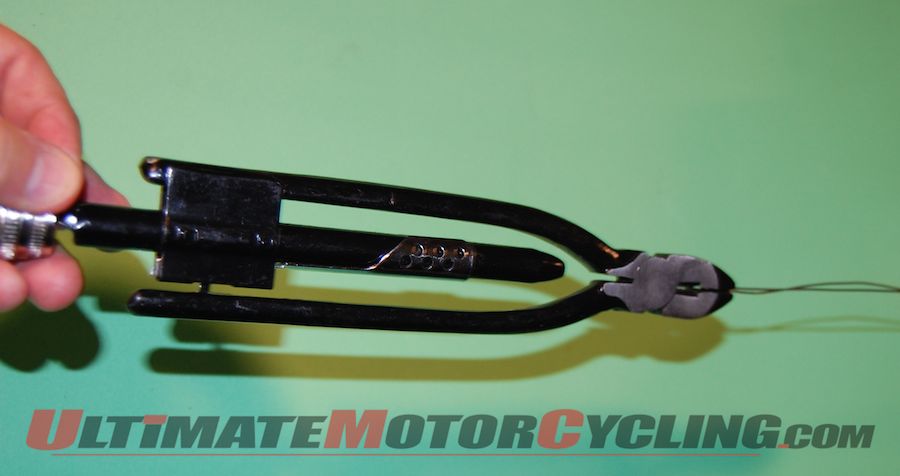
T-304 stainless steel wire and special twister pliers are all you need to give critical fasteners maximum security.
After estimating the length of a single wire required to go from the fastener to anchor point and a bit beyond, double it and cut the ends even.
Pass the wire through the drilled fastener and lock the ends of the wire side-by-side in the jaws of the plier.
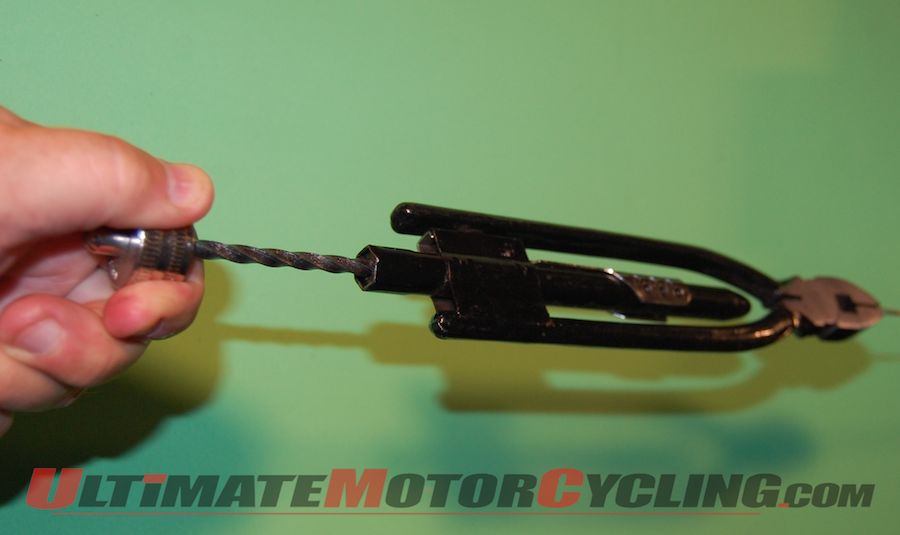
Let go of the handle of the pliers, grasp the knob of the twister and pull to start twisting the wire.
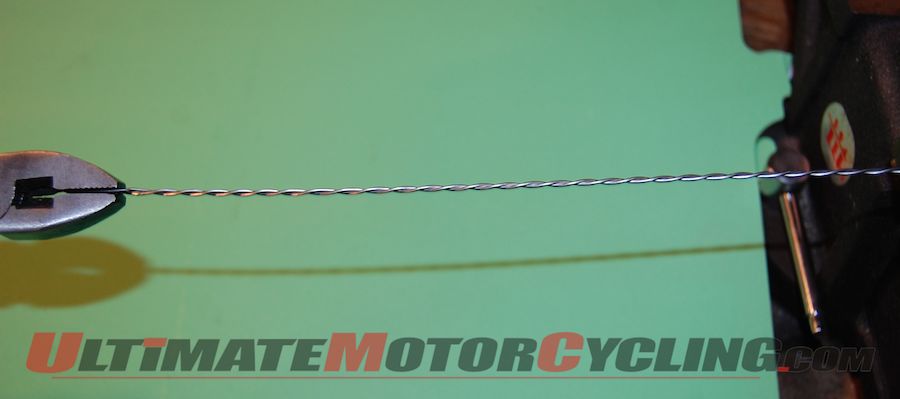
What the twisted wire looks like.
Safety Wiring Your Motorcycle
If you don’t race motorcycles, you may not think of using safety wire to secure fasteners. However, safety wiring in non-competition situations may is not a bad idea.
Safety wiring fasteners goes back quite a ways, and it has provided assurance that fasteners that remain absolutely in place. This is no knock against chemical thread locking compounds, lock washers or plastic snubber nuts; they all have their place and are quite effective.
Safety wire, however, comes into play as a good option when extremes of temperature, vibration, shear, tension, torque or other high-stress factors may be present.
In motorcycle-racing competition, rules require safety wiring of various components such as axle pinch bolts, oil-pan drain plugs, oil filter covers and other caps and points of closure. Some track day organziations also require safety wiring for the quickest classes.
So, in the context of long-range touring, back country adventure riding and even day-in-day-out all-around riding, using safety wire on some things may not be a bad idea. It may also be a very good way to assure that those $300 carbon fiber body panels or other bits you paid for can’t part company from the bike if those tiny minimally invasive fasteners don’t hold.
With that in mind, we offer our top five tips for safety wire.
1. Safety wire is not just any wire.
Lest a person be tempted to drill out some bolts and just use some lightweight wire you may have around the shop, it is important to note that safety wire is a specific high-tensile strength type of product. It is tough, but malleable corrosion resistant stainless steel. In this example, it is 0.041” T-304 stainless steel material. Be sure to wear personal protective gear such as safety glasses and gloves when working with it as the cut ends are very sharp and it tends to spring when released. Other grades or sizes may be useful for a given application.
2. Safety wire pliers are not just any pliers.
The safety wire twister has special knurled jaws to better grip the wire and a side cutter. It also has a spiral shaft similar to the driver in a child’s toy spinning top as well as a sliding jaw-lock. To use the pliers, lay the two even-cut ends of the safety wire in the jaws side-by-side (if they crossed in the jaws, it makes locking the jaws a real test of grip strength). Squeeze the pliers down until the locking tab goes into the lock and slide the lock handle back to lock the jaws onto the wire. To begin twisting the wire, let go of the handles of the plier and pull back on the knob at the end of the twister tool. After each pull, grasp the plier handles again and let the twister knob retract into the handle and repeat the process until you have the tightness of twist you want.
3. Drilling the fastener or item to be safety wired takes care.
Have a number of high quality drill bits handy of the size appropriate for the fastener and application. This is because you may go through a few, especially at first. Dimple the face of the hex or fastener you want to drill with a punch for a starter point, and start the drill straight in to form a pocket for the bit to fully engage in before you turn the bit to drill across the hex corner from one face to the adjacent face. It is at this point that bit breakage can occur. Take your time and use moderate pressure to drive the drill in.
4. Plan carefully for the length from the fastener to the safety wire anchor point and beyond.
It’s necessary to plan the length of the wire to go beyond the anchor point because more wire twist must happen to secure the wire to the anchor point.
5. Be sure to have the safety wire travel from the fastener to the anchor point in the direction that fastener would be turned to tighten it.
This is to put the safety wire in position to oppose movement of the fastener in the direction it would have to turn to loosen. Minimize the slack between the fastener and the anchor point.
Granted, safety wiring bits on your bike may not be something you’re inclined to do for all sorts of things, but for those things that absolutely, positively must not come loose, it’s a cheap, simple and certain way to go.
Have you ever wanted to ride a real MotoGP track? Well, here’s your chance! Leod Escapes does all sorts of incredible touring experiences with the very best that Europe has to offer. Fabulous accommodation, incredible food, and motorcycles what more can you ask for! So for the trip of a lifetime, visit LeodEscapes.com and check out your dream vacation.
* * * * *
The 2026 Aprilia Tuono V4 Factory 1100 remains one of the purest expressions of excess in motorcycling, standing proudly as an example of two-wheeled wish fulfillment done right. There are no gimmicks, pangs of guilt, or disappointment in the Tuono V4 Factory; it is simply a damn good bike. Nic de Sena tells us all about why you need this exceptional motorcycle in your garage.
* * * * *
This year, ARCH Motorcycle shocked the MotoAmerica Mission Super Hooligan series by capturing their first historic race win. To explore the massive behind-the-scenes effort that fueled this success, we sit down with Executive Producers John Stevens and Chance Wright, of the new six-part docuseries, Hooligans: The ARCH Racing Project with Keanu Reeves & Gard Hollinger. In this segment, they give us an inside look at the show, which follows ARCH as they transition from building custom bikes to entering the high-stakes world of professional racing. Joining us alongside is Brad Knight from technical partner BDO. BDO USA serves as the official race tech and consulting advisor for ARCH Racing. Their technology partnership centers around a bespoke, AI-powered race intelligence platform designed to drastically optimize the team’s track performance. The AI side of this project focuses on taking raw race and telemetry data and transforming it into immediate, actionable insights for the crew. It’s a fascinating insight into the new technology that helps make them faster on track.
* * * * *
Our guest this episode is Paul Puma, President of the United States Motorcycle Coaching Association (USMCA) and a Relationship Manager for Wells Fargo Motorsports Division. He leads the organization in connecting riders with certified coaches to promote nationwide safety, skill development, and sport growth.
* * * * *
Here’s quick reminder to check out our monthly digital magazine. It’s filled with everything you want to read on motorcycling, including some things you’ve probably not seen elsewhere. It’s absolutely free and you will find it on the Apple App Store and of course on Google Play as well.
Don’t forget to leave us your comments on our social media—we’re on all the usual platforms at Ultimate Motorcycling. We love hearing your feedback… so good or bad, please let us know what you think. If there’s something you’d like us to cover, we’d love to hear those ideas too!
We use cookies and browser activity on this website
Functional
Always active
The technical storage or access is strictly necessary for the legitimate purpose of enabling the use of a specific service explicitly requested by the subscriber or user, or for the sole purpose of carrying out the transmission of a communication over an electronic communications network.
Preferences
The technical storage or access is necessary for the legitimate purpose of storing preferences that are not requested by the subscriber or user.
Statistics
The technical storage or access that is used exclusively for statistical purposes.The technical storage or access that is used exclusively for anonymous statistical purposes. Without a subpoena, voluntary compliance on the part of your Internet Service Provider, or additional records from a third party, information stored or retrieved for this purpose alone cannot usually be used to identify you.
Marketing
The technical storage or access is required to create user profiles to send advertising, or to track the user on a website or across several websites for similar marketing purposes.