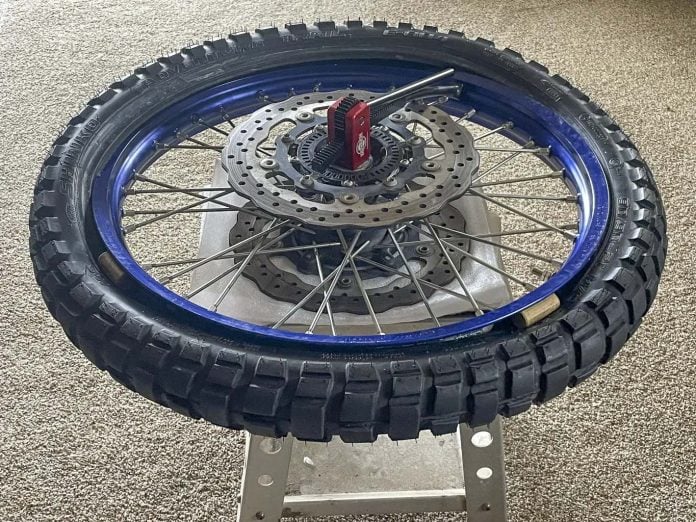
The Baja No Pinch Tire Tool makes easy work of installing the last bit of the tire bead that is usually the culprit when your tire spoon puts a hole in a replacement tube.
Brought to market in 2014 to solve a singular tire repair issue, The Baja No Pinch Tool pushes the bead over the wheel rim without going near your tube. I carry mine in my extended-day toolkit to help others on the trail when I ride into more remote areas. It weighs about 1.8 pounds, and the longest piece is 13 inches. The three pieces break down for easy carry at the bottom of the pannier on the Ultimate Motorcycling Yamaha Ténéré 700 Project Bike.
If you have been riding long enough, you will have pinched a tube or come across someone in the middle of nowhere who did. In those situations, there is hopefully a last patch or a last spare tube offered up by a Good Samaritan.
Because it is a very real possibility to pinch a tube using tire spoons, everyone helping gets nervous about levering on the last six inches of bead over the rim. The Baja No Pinch Tire Tool simply pushes the bead sideways onto the wheel and guarantees a successful tube installation. It is not recommended for tubeless tires as their beads are softer, making it possible to scratch or nick the bead, causing a slow leak.
The No Pinch Tire Tool uses the leverage of a rack and pinion to push the bead out until it drops below the rim. While the company has instruction videos on the Baja No Pinch website, there is no substitute for practice. It took me a few tries to adjust the tension of the axle shaft against the push rod, as well as figure out where exactly to push on the bead.
The push rod is curved to prevent it from touching your rim, as long as you place the end against the tire in the right spot. Trial and error in your garage will save a lot of frustration on a rainy day in the mud.
I practiced on the Yamaha Ténéré 700 front wheel. Because the tool’s axle shaft is longer than my front wheel is wide, from brake disc to brake disc, I sat the tire on my bike stool. It has a hole in the center to allow the axle shaft to protrude. If this was on the trail, I would have had to set the wheel between two rocks or on flat ground and dig a few-inches-deep hole below for the axle rod to extend. The axle rod is long because it is getting most of the backward pressure from the lever arm pushing on your bead. If it were shorter, it might pull out.
Different hubs have different axle sizes ranging from 17mm to 25mm. Some bikes have a 17mm front and a 20mm rear. The Ténéré 700 has 20mm axles, so that’s the kit I got for $160 MSRP. Make sure to order the correct axle rod for your bike or order Baja No Pinch’s Ultimate Tire Tool Kit ($245), which includes all 4 axle sizes, 15mm, 17mm, 20mm, and 25mm. You won’t be able to use a larger axle rod on a narrower axle shaft. Baja says you can use a narrower axle rod than the axle hole in an emergency, but the geometry will be off, and you might bend the tool.
The Baja No Pinch Tool will easily help get the first bead over the rim, as most of it can be pushed on with a bit of muscle. The No Pinch then pushes the last bite into the rim center. Keeping whatever portion of the tire you can push on by hand in the drop center of the rim—I use two wine corks—use the device, alternating left and right, to slowly and safely push the bead over the rim. No spoons, no pinch.
I know the correct technique to avoid pinching a tube, but that doesn’t mean I can execute it perfectly every time. If you have been changing tube tires and fixing flats for many years, you might not see a need for a Baja No Pinch Tool. I see it as both insurance and assistance in flat repair. It works easily, and you are guaranteed to not ruin your trail side repair by a slip or bit too deep of a dig with a tire spoon. When you do get one, learn how to use it by practicing with it before you need it.


