
SRC Moto in Pendleton, Oregon, is the largest global distributor for SRC Thailand. SRC Thailand creates protection products for nine major motorcycle brands, and SRC Moto distributes them. In addition, SRC Moto manufactures accessory products under the Motostuff brand inside a repurposed firehouse with for-rental bedrooms that also serves as the company’s headquarters. For the Ultimate Motorcycling Honda CRF300L Rally, I raided the SCR Moto catalog for the Crash Bars/Engine Guard with Integrated Skid Plate ($388), the SRC Full Dash Panel ($228), and the SRC Headlight Guard ($89).
Social media forums are full of upgrade and accessory suggestions for the new Ultimate Motorcycling Honda CRF300L Rally project bike. I’m a firm believer in riding the bike in stock condition until upgrade needs become apparent. That was up to the first oil change at 600 miles for me. Riding style, body size, road and trail conditions, and personal taste all affect how I personalize a bike. Someone who is 6-foot-7 and 250 pounds riding enduro events will have completely different needs than I do at 5-foot-10, 195 pounds, riding forest roads or longer mixed-surface days.
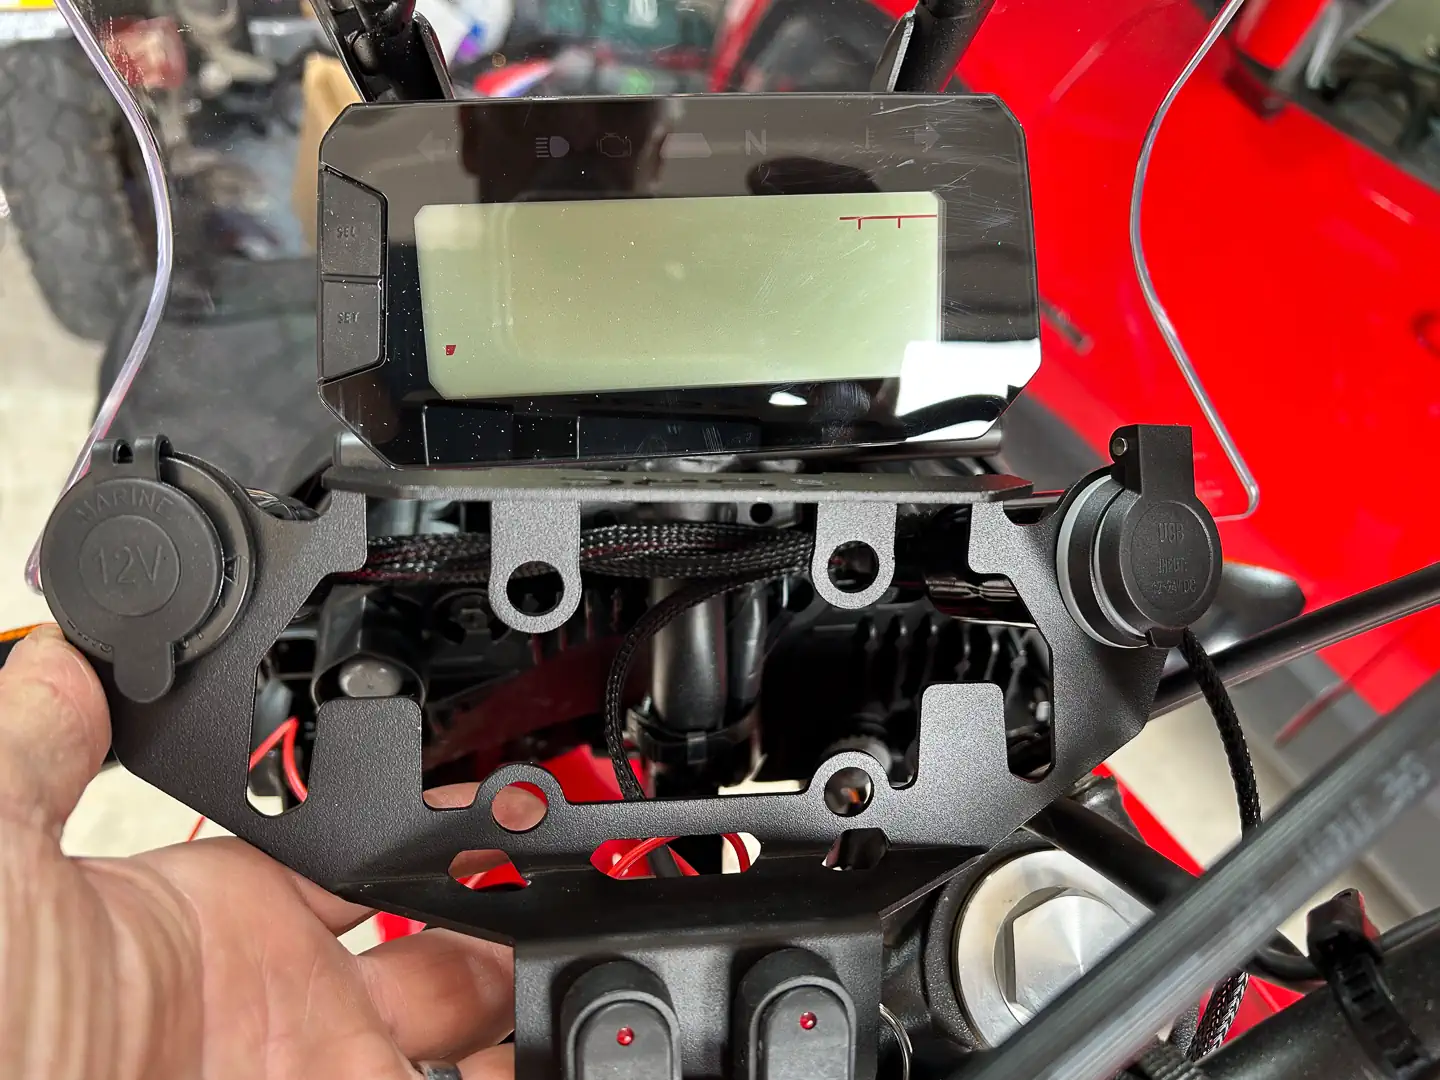
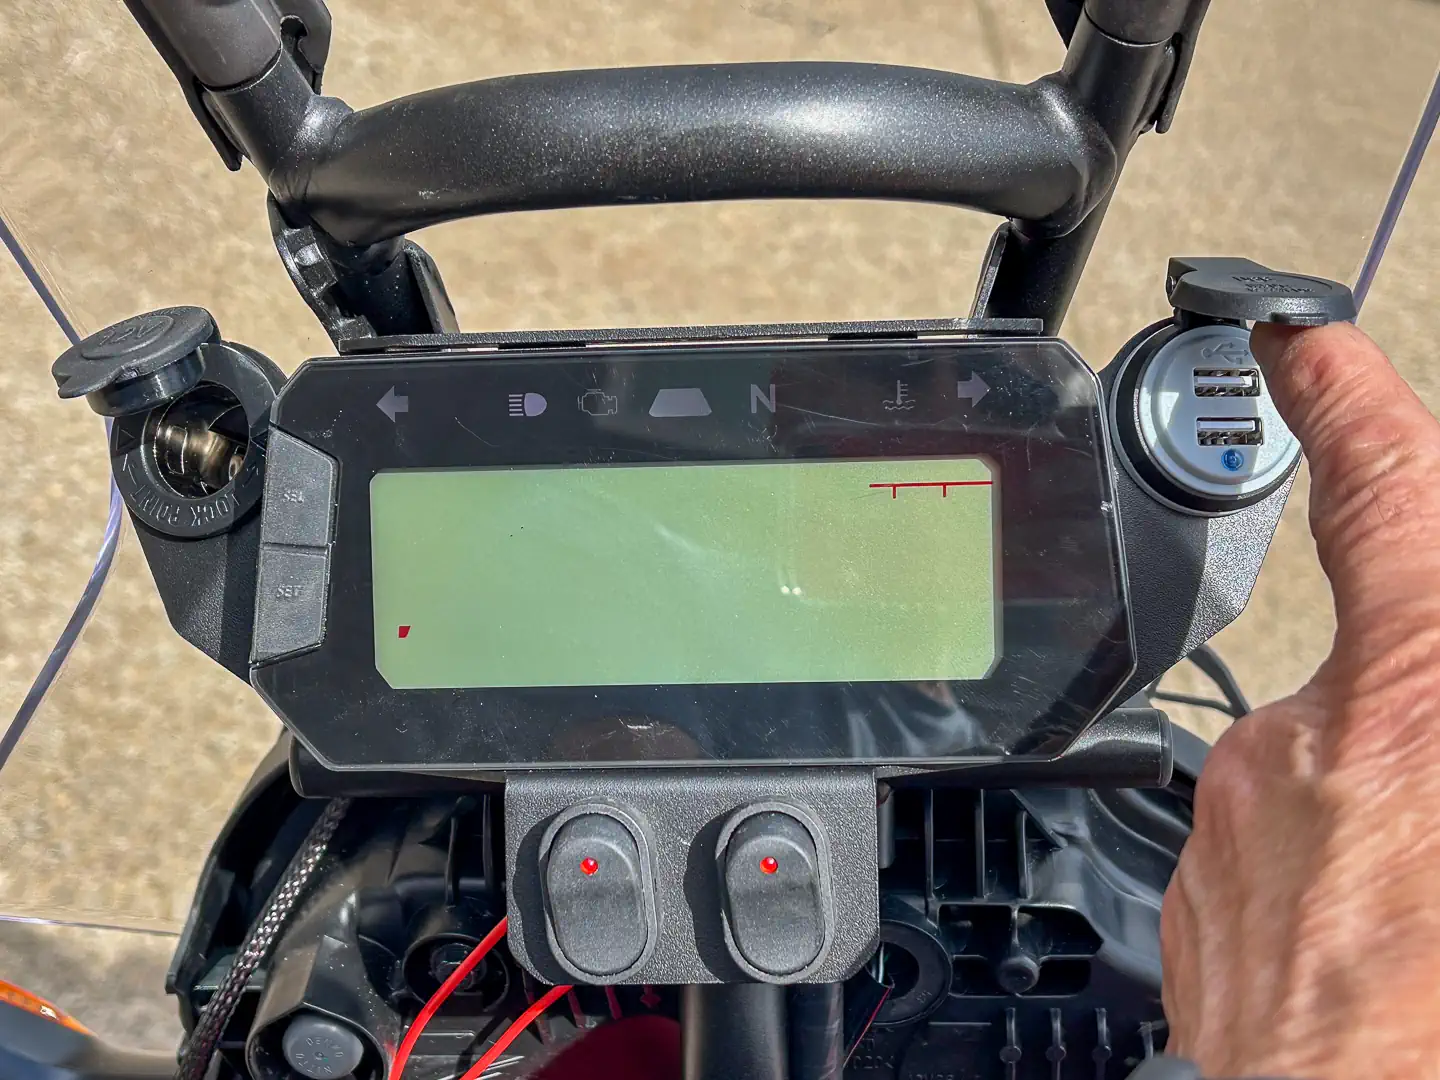
The first upgrade I identified was power for my iPhone and Garmin XT2. The Rally has a 15A power connector under the left front plastic panel. The SRC Full Dash Panel provides a dual USB charger, one 12-volt socket, and two rocker switches with LED indicators. The Dash surrounds the speedo cluster.
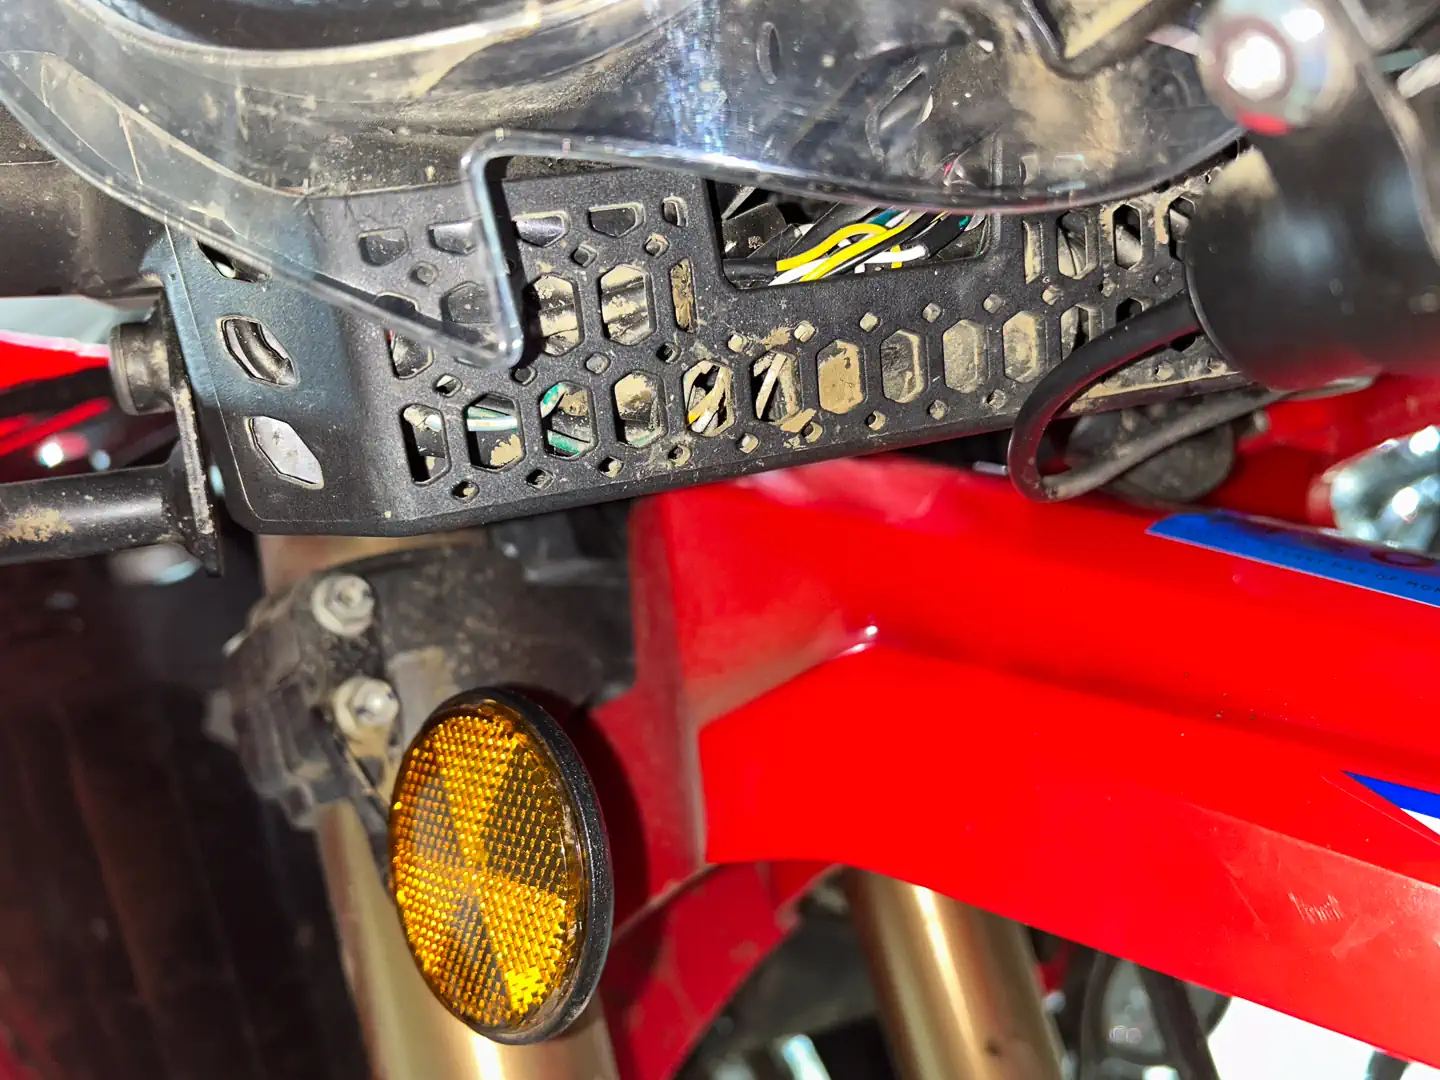
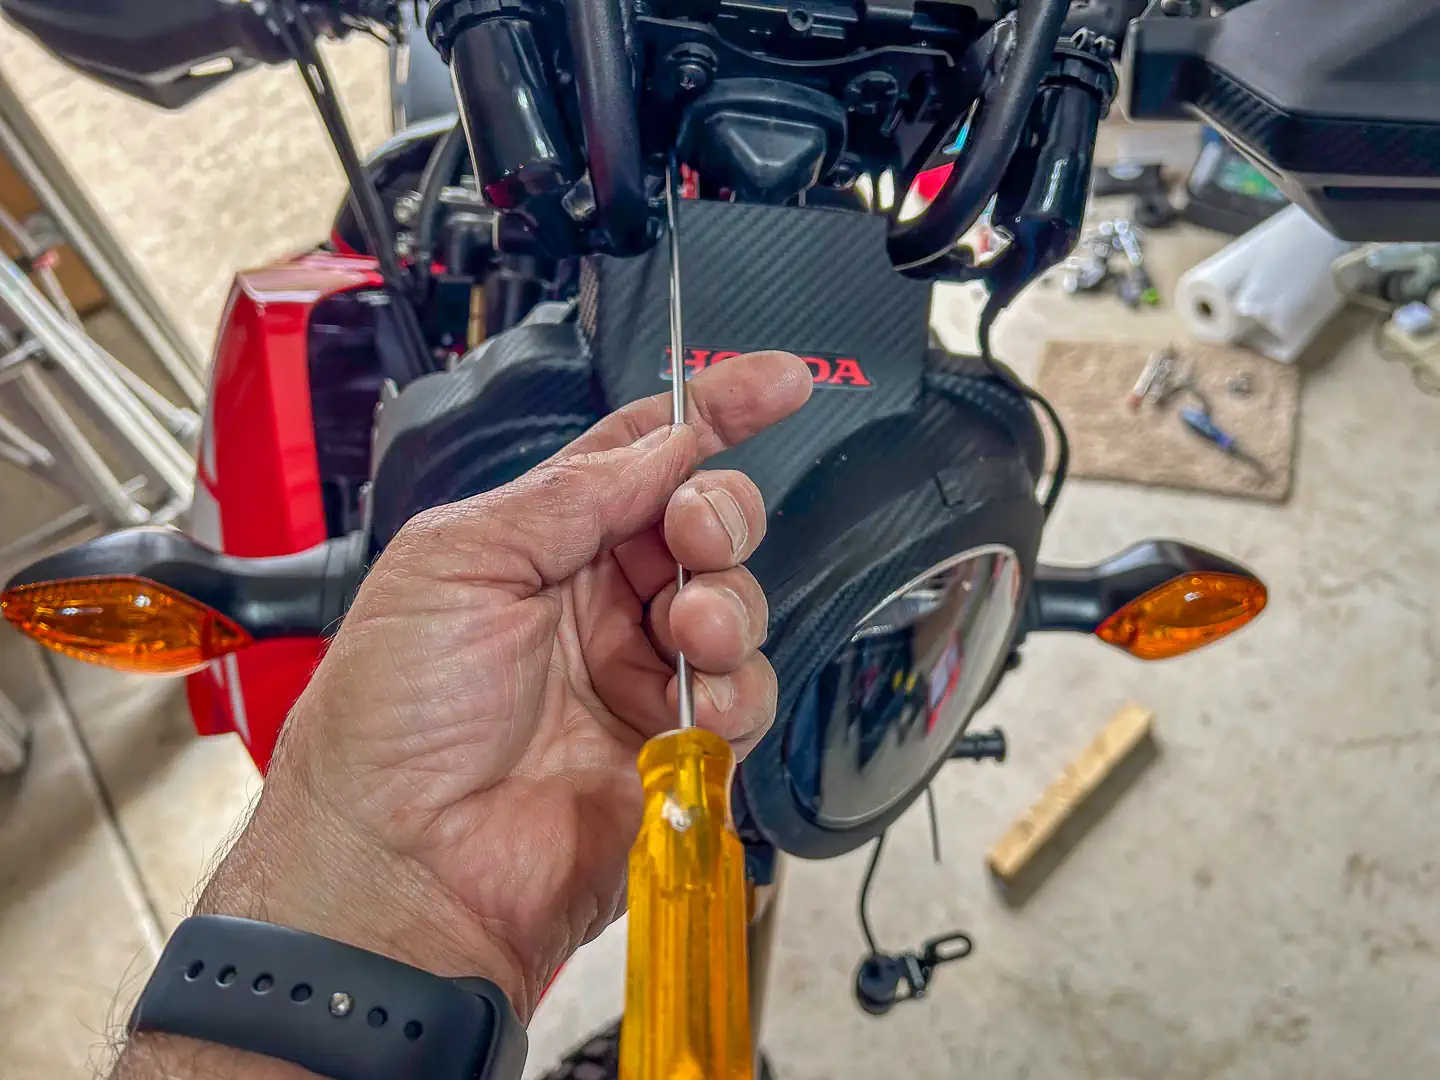
Although it’s mostly a matter of unbolting and re-bolting, it’s one of the longer and more challenging projects I’ve done on the 300 Rally. It took about two hours the first time. There are no written instructions—only a customer video for reference. The process sounds simple: remove the windshield, undo the two top screws holding the speedo cluster, drop the wiring tray below the headlight, undo the lower screws, disconnect the harness, slide the speedo into the Dash, and reassemble.
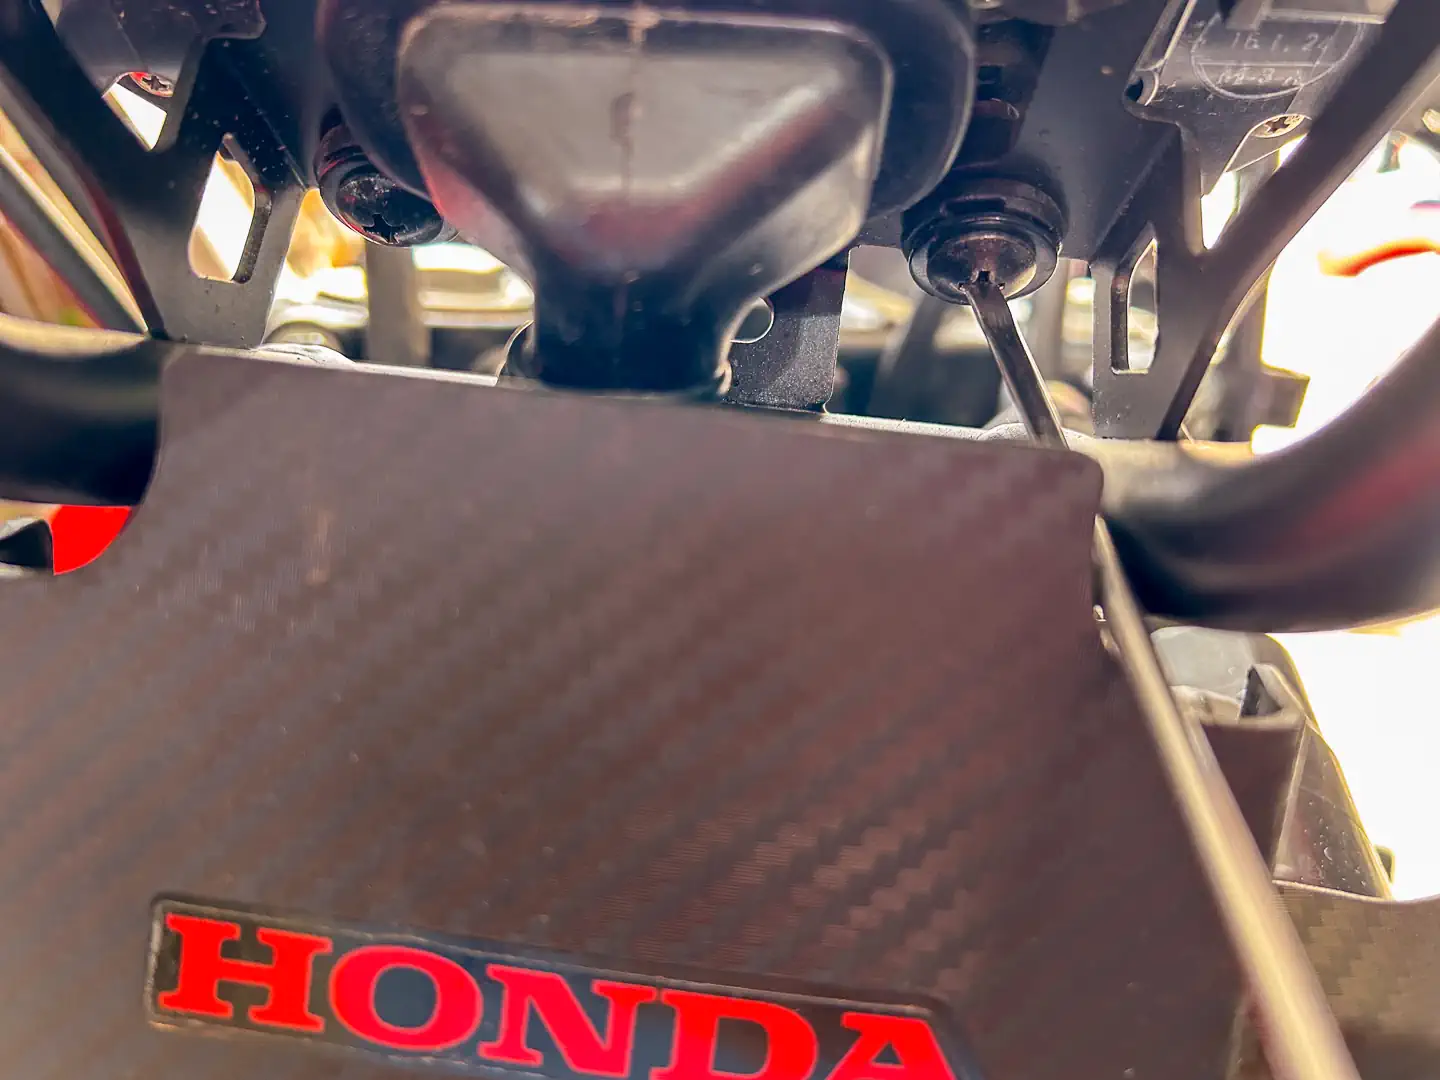
The first issue is that there’s no straight shot to the top two screws. Most advice says to remove the headlight because it blocks screwdriver access. I remembered my 14-inch mini blade screwdriver, which I could flex just enough, and it worked. The bottom two screws require dropping the wire tray below the headlight. The hard part isn’t removal—it’s the reassembly around the front-end wiring bundle. The second reinstall took five minutes; the first took at least half an hour. The second was during the installation of the HammerLEDs turn signals, and the third was during the Kisan Headlight Pathfinder modulator install.
Once installed, the Dash connects via plug-and-play to the left-side power connector for the dual USB and 12-volt socket. The two rocker switches tap into the same 12-volt line upstream using the included Posi-Locks.
When I got deep into disassembly, I stopped checking the time, working blind through the following steps. Like most motorcycle work, the second time around, we’re all experts. The Dash performs as expected. I now have USB-A power to my phone and Insta360 X5 action camera. The 12-volt socket holds a USB/voltmeter, the right rocker powers my Garmin Zumo XT2, and the left powers my Denali D3 driving lights.
In the end, the SRC Full Dash Panel is one of those upgrades that takes time up front but pays off every ride afterward. Once installed, everything works cleanly and feels integrated, rather than tacked on. Like most worthwhile projects, the first attempt is a learning process, and the second time is easy. That is part of the satisfaction that comes with setting up a motorcycle to fit your own riding style and needs, doing the work yourself, and knowing it’s done right.


